
Create artifacts and artifact relationships
objectiF RM offers the option of extending existing element types with custom artifacts and relationships. Custom artifacts behave functionally in the same way as the element types included in the tool by default.
You then define a corresponding form for each new artifact type, which can later be used to create and edit the artifact. This allows you to design context-specific dialogs with the appropriate input fields – flexibly and purposefully.
Define user-defined artifact types
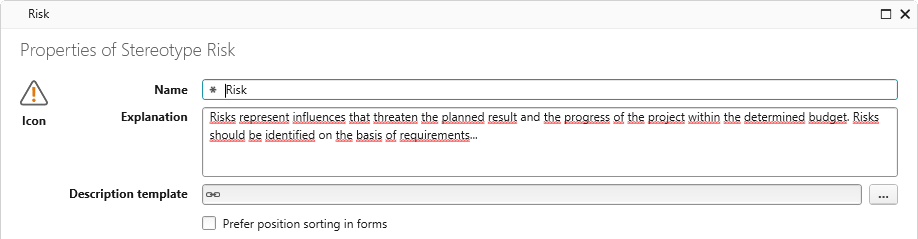
The following example shows how to create the Risk artifact.
If you want artifacts to be available to all or future projects of the organization, rather than just one project, create them in a project template. Be careful, because the changes you make in the project template are copied to all projects that are created with it.
- Open the Stereotypes window via the vertical function bar.
- In the window, find the Artifact entry, open its context menu, and select the command Create → Create Stereotype.
- In the following dialog, enter a name for the new artifact type. If you also want to use an icon, you can assign a symbol using the Icon button.
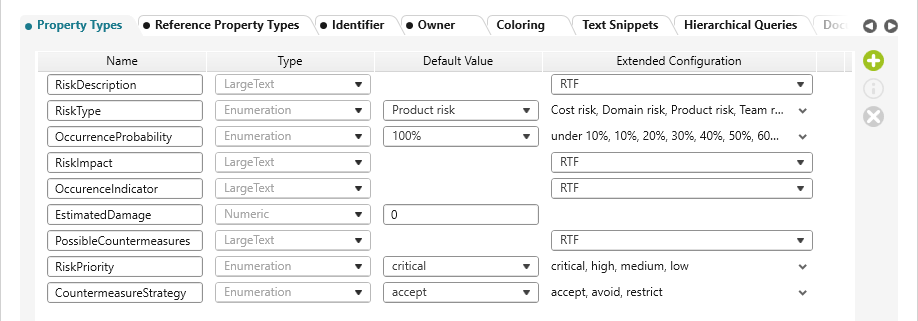
In addition to a description field and the name, it should later be possible to specify which type it is, what costs it incurs, and how high the probability of occurrence is assessed. It should also be displayed who created the risk.
- On the Property Types tab page, use the Plus button to create properties that are required and define values for them.
Project team members are saved in the ProjectUser property. You can use this property by selecting it as the reference property type.
- Switch to the Reference Property Types tab and click the Plus button.
- In the Name column, name the reference property and leave the type as is.
- In the column Stereotype of the referenced element, click the […] button and select ProjectUser from the list.

- In the Identifier tab, specify the scheme according to which the identifier is to be generated. If you do not specify anything here, the Artifact schema is used.

- On the Owner tab page, specify the element from which the command for creating the artifact is to be offered later. Select Package here.

- Click OK to save.
Define artifact relationships
To model custom relationships between artifacts, create your own relationship stereotypes. These define which elements can be linked to each other and – if required – which additional properties the relationship should have.
- Open the Stereotypes window.
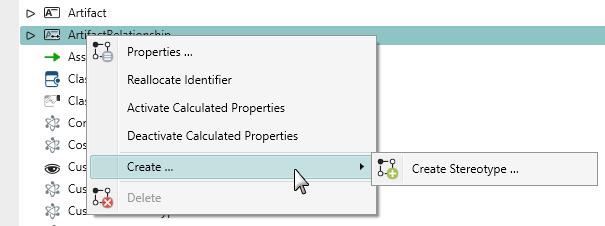
- From the ArtifactRelationship context menu, choose Create → Create Stereotype.
- Give the relationship a name.
You want to create a relationship between a risk and requirements. Determine who is the source and who is the target in this relationship. - Using the […] button behind the Source stereotype, select “Risk” and “Requirement” as the Target stereotype.
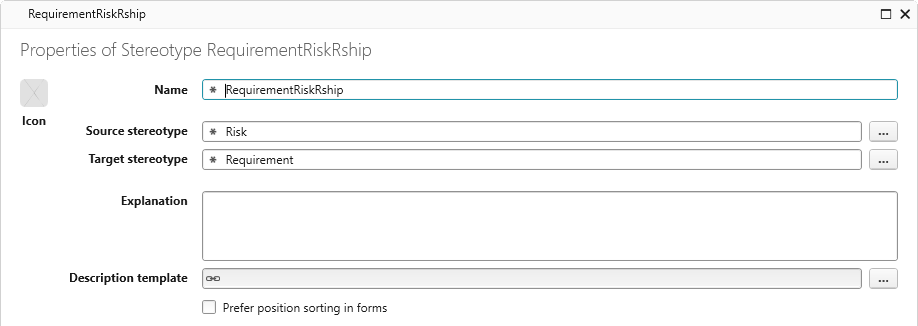
- Specify property types if you want to attribute the relationship.
- Save with OK.
Repeat these steps if you also want the artifact to have a relationship to other elements.