Extension function with user-defined property
The following example shows what a function can look like that moves requirements to another package. Only the requirements that are in a particular state are moved. The state is represented here by a user-defined property. To be able to work with extension functions in the project, you must fulfill the following prerequisites:
- Set up the Node.js server for the service in the Service Manager
- for editing you need an appropriate tool, e.g. Visual Studio Code
Creating user-defined properties
First of all, you need two user-defined properties for the example used here. A reference property for the stereotype Package and a custom property for the stereotype Requirement. To extend the stereotypes, you need administrator rights.
Create reference property
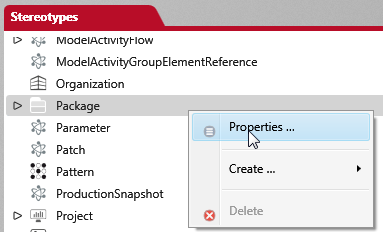
- Open the Stereotypes window via the eye by clicking Show Stereotypes.
- Go to the Stereotypes Package and choose Properties from the context menu.
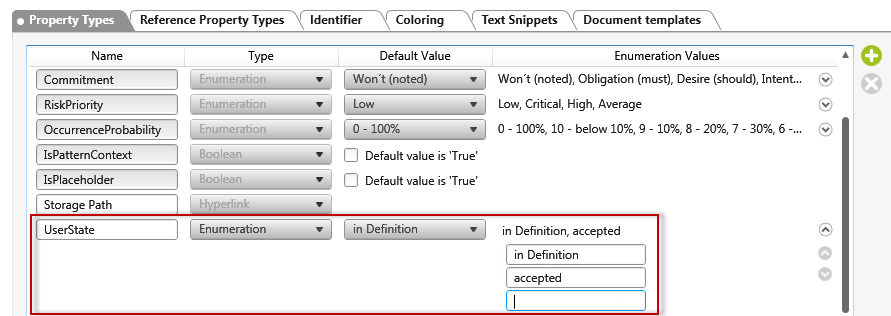
- Switch to the Reference Property Types tab and use the plus button to create the Archive property.
- Enter a name, for example Archive, and select the stereotype Package in the Stereotype column of the referenced element using the […] button.

- Confirm with OK.
Creating a user-defined property
- Go to the Requirement stereotype and choose Properties from the context menu.
- On the Property Types tab, use the plus button to create a property of type Enumeration and define various states.
- Save with OK.
Create extension function
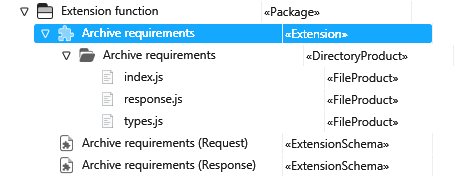
Next, create an extension function. By default, the extension functions are located in the Settings window in the Extension Functions package. You can also create an extension function in another package.
- From the context menu of a package, choose Create other/ Extension Function.
- Assign a name and select a stereotype. Since the function is to be applied to a requirement package, select Package or a substereotype such as Requirements. The required request and response schemata can be easily created by objectiF RM, as can the source code directory with the initial file.
- Select the options Create request schema automatically, Create response schema automatically, and Generate Directory including Main File.
- If necessary, enter a description in the Description tab. This description is displayed later when you use the extension function.
- Switch to the Parameters tab and use the plus button to create a parameter for the user-defined State property.
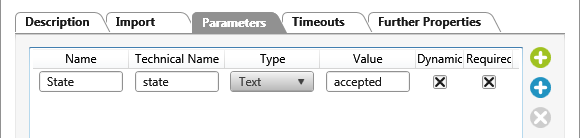
With the definition selected here, the state accepted is automatically proposed later when the function is executed, but it can also be overwritten.
- Press OK to save the extension function.
When you create the extension function, the schemas are automatically created in addition to the source code files.
Define schema
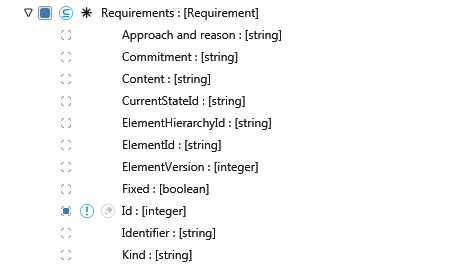
In the schemas, you define which data is made available by the tool for the extension function and which data can be changed. From this schema definition, objectiF RM then generates a JSON schema for later execution of the extension function. The following information is required for this example so that the extension function can be executed:
- the package that contains the requirements
- only requirements in the status accepted are moved
- the target package must be known
- On the Archive requirements (Request) schema, choose Edit from the context menu.
- On the Schema tab, expand the properties under Package by clicking the small arrow.
- First select the Id property and set the Is currently required option by clicking the exclamation mark icon.

- Scroll down to Requirements and choose the Id property.
- Scroll down until you reach the Current state property. Here you select the property Id and Name.
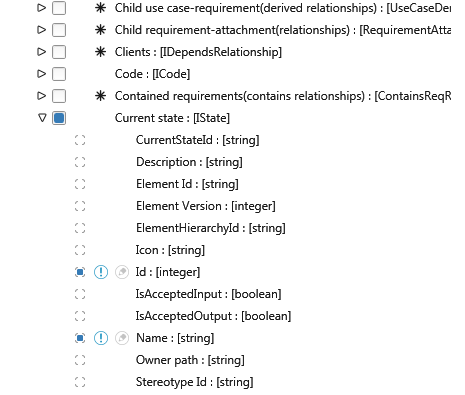
- Continue with the property Owner. Here you select the property Id again.
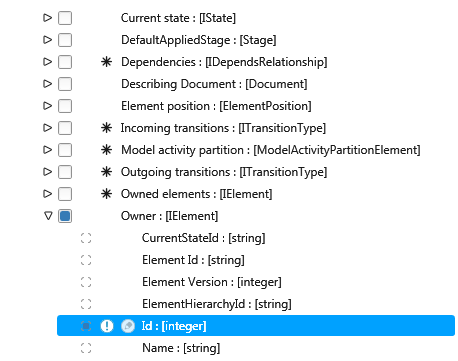
- Finally, scroll to the user-defined Archive property. Here you select the property Id again.

- Save with OK.
Develop function
Now write the function, e.g. in Visual Studio code. Of course you can also use another program.
- Select the Archive requirements directory and click Open directory in VS Code in the context menu.
- In Visual Studio Code, select the index.js file.
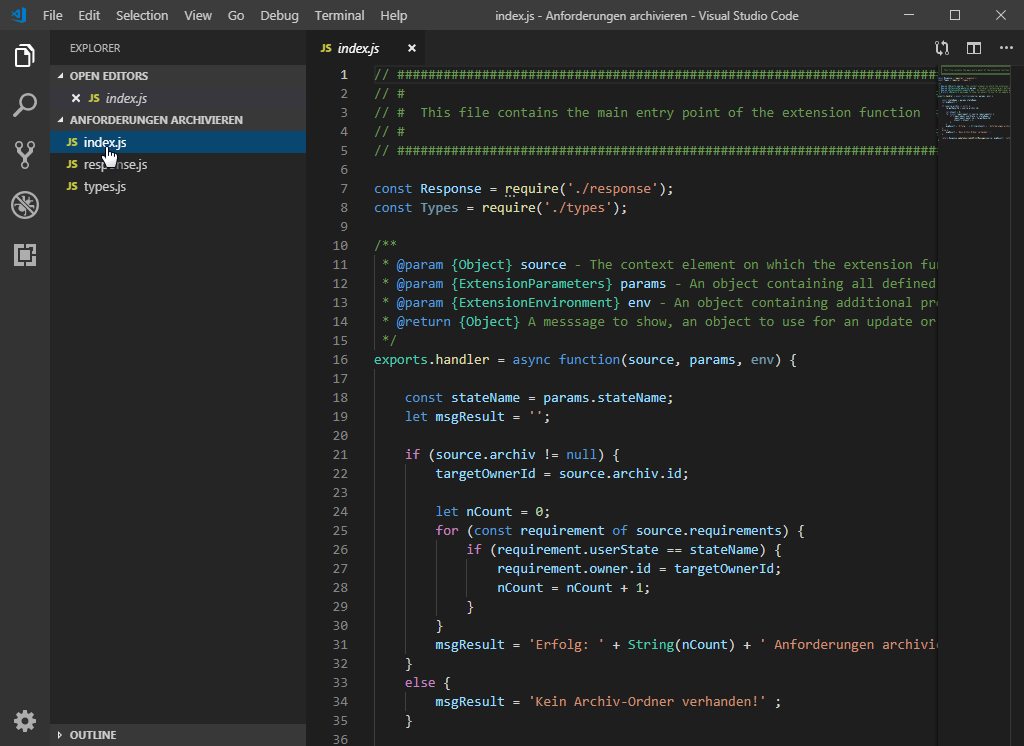
- You can now enhance the generated initial file with your own code. The code for this example could look like this:
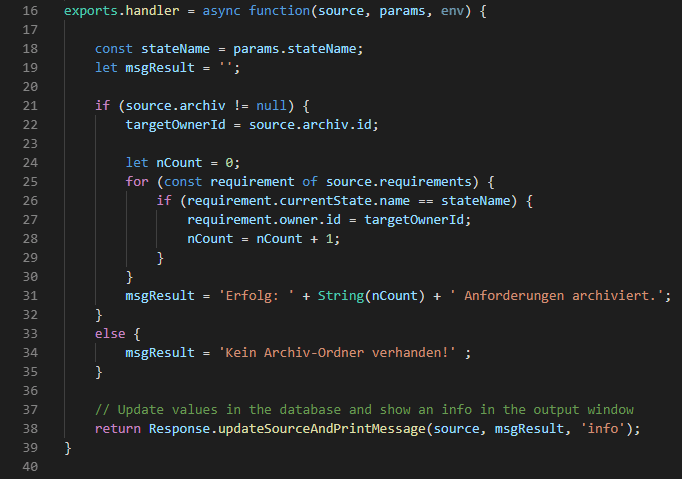
In the parameter source the package with the request is passed in our example, params contains the additionally defined parameter state as params.stateName.
The function checks whether an archive package is assigned to the requirement package. If so, its ID is stored in the targetOwnerId variable. The package is then searched for requirements (source.requirements) and checked to see whether there are any requirements with the status accepted. If this is the case, the requirements are moved to the archive package.
Finally, the Response.updateSourceAndPrintMessage function, which issues a success or error message, is called to save the changes.
Note that the technical names from the schema definition must be used in the code, with the convention that the first letter is written in lower case. You can find the exact identifier names in the JSON schema by choosing the context menu command View JSON Schema on the extension schema.
Make function available
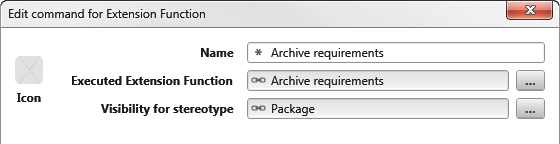
You can now make the extension function available in the project by creating a command, defining a task or an action. In this example, a menu item is defined for the context menu.
- To do this, go to the backstage menu of the project and choose Commands for extension functions.

- In the view, click the plus button.
- In the subsequent dialog box, enter in the Name field how the command is to be offered in the context menu.
- Under Executed Extension Function, select the extension function using the […] button and enter the stereotype Package in the Visibility for stereotype field.
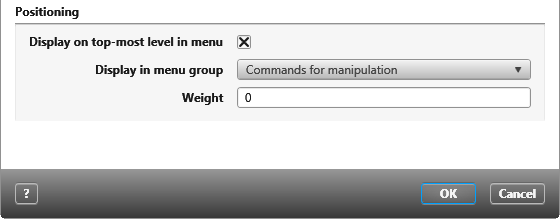
- Select the Display on top-most level in menu and then select a menu group from the drop-down menu.
Further information such as icon, localization and weight are optional. - Save with OK.
Execute function
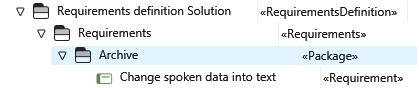
Before you execute the extension function, create an archive package and specify the package into which the requirements are to be moved for the package that contains the requirements. Choose Edit to open the properties of the package and switch to the Further Properties tab.

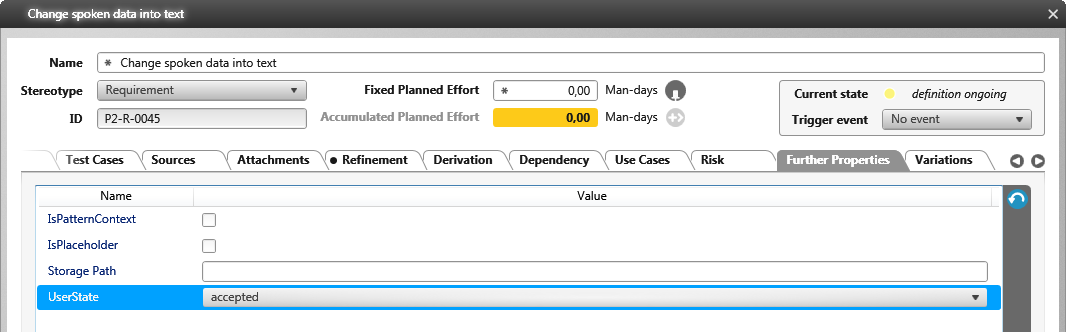
In addition, the defined state must be assigned to the requirements on the Further properties tab. Only then can they be moved to the package intended for this purpose.
- From the context menu of a package, choose Archive requirements.
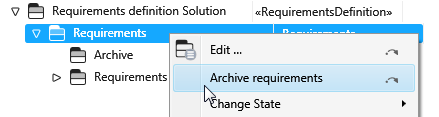
- You can simply confirm the next dialog with OK, since the defined value has already been preselected. Alternatively, you can overwrite the value.
In the output you will find a message that eight requirements have been archived and you will find the requirements in the specified package.