Filter and Sorting Settings for Generating Documents
By default, elements are generated into documents in the order in which they were created. However, you can change the way they are sorted by selecting one or multiple properties in a document template as the criteria by which they are sorted. Such properties include names, assigned workers, priorities, etc. It’s also possible to select user-defined properties as the sorting criteria.
Filter Elements and Generate into Document
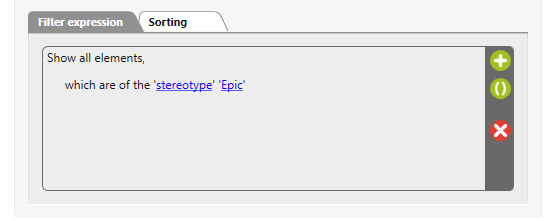
If no filter has been selected in a document template, all elements from a specified package which are of the same type will be generated into a document. However, if you only want certain elements which meet certain conditions to be generated into a document (i.e. Epics or test cases with specified states), select a filter in the document template. This will ensure that only elements fitting the filter criteria will be generated into a document.
Modify Document Template
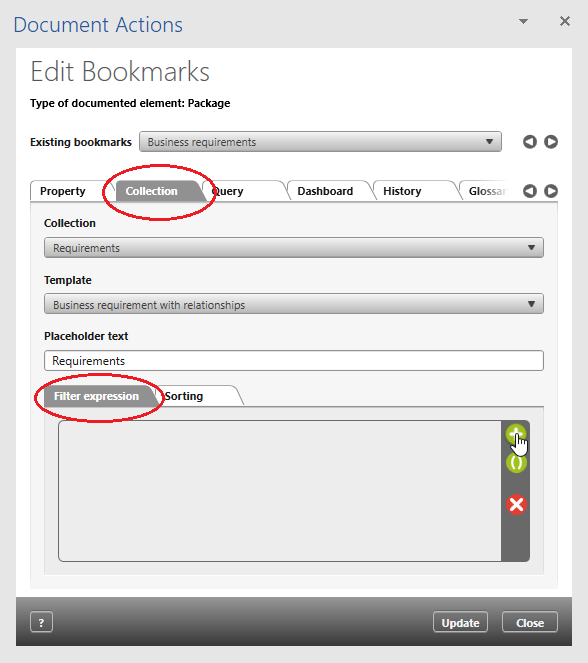
- Open a document template with the context menu command Edit.
- Go to the Collection tab.
- Go to the Filter expression section below.
- Click on the Plus button to create a filter.
- Click on the blue underlined entries to define the filter.
- Click Insert and save the document.
In order for the changes to be applied when generating documents, you need to create a document or chapter from the modified template.
Sorting Elements and Generating Documents
If no sorting criteria has been configured for a document template, all elements from a specified package which are of the same type will be generated into a document. However, if you want to generate elements according to a set property (i.e. name, id, state or assigned workers), you need to adjust the document template by defining how the elements should be sorted. It’s then necessary to create a new document or chapter from the modified template.
Modify Document Template
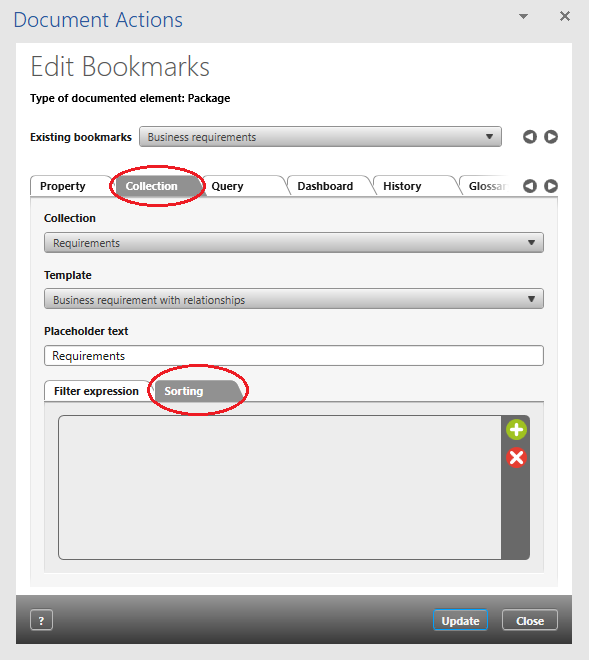
- Open a document template with the context menu command Edit.
- Go to the Collection tab.
- Go to the Sorting section below.
- Click on the Plus button to create a sorting field entry. Here, you can define multiple properties; the order of these properties also determines the order they are sorted. If you would like to change this, select the desired property and drag & drop it to where you want.
- In the drop-down menu, select the property which you want to sort by.
- Select a sorting direction (i.e. ascending or descending).
- Click Insert and save the document.
In order for the changes to be applied when generating documents, you need to create a document or chapter from the modified template.


