Import and Export ReqIF Files
You can import and export requirements with properties and property values from a ReqiF file to objectiF RM.
Importing requirements
-
Within a project, switch to the backstage menu and choose Import/ Import Requirements.
-
In the next dialog box, select a ReqiF file and specify packages in which the requirements and other information, such as specifications and relationship groups, are to be stored in objectiF RM.
-
Under Mapping Table, select a mapping to be used for the import. If no mapping exists, click the green plus button to create a mapping table.
-
Click Continue.

-
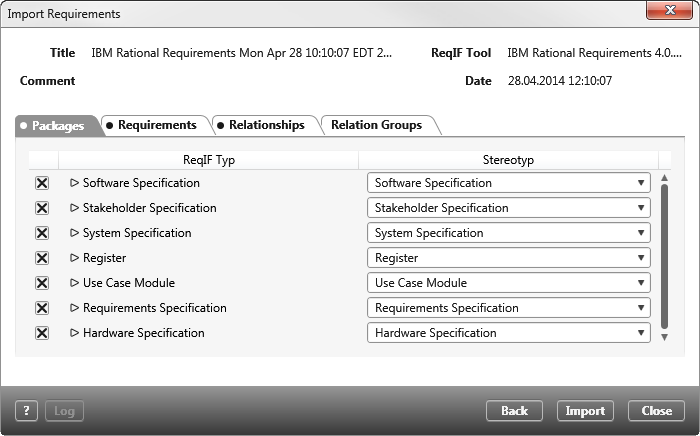
In the next dialog, you determine in the individual tabs what is to be imported and map these with the corresponding objectiF RM types.
On the left side you see all possible ReqIF types contained in the ReqIF file. You can assign these to the stereotypes – on the right side – by selecting the corresponding stereotype from the dropdown menu. Use the checkboxes to select or deselect ReqIF types and their attributes. -
Then click Import.
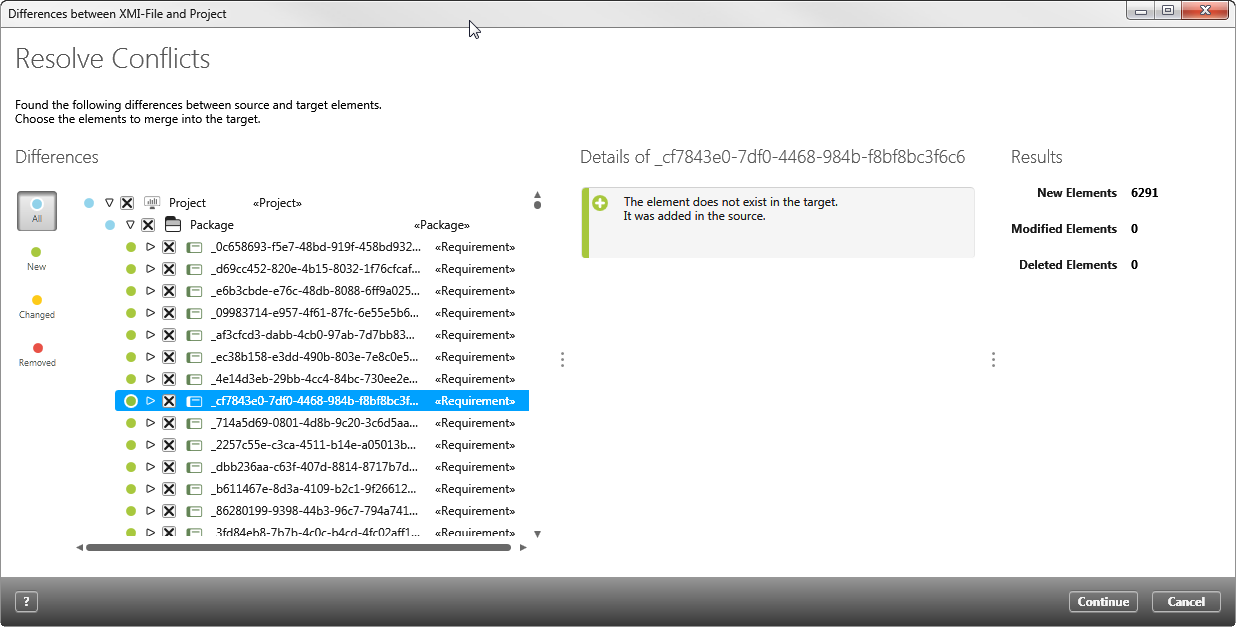
- In the Differences between XMI-File and Project dialog you can see the requirements that are being imported. Here you can determine which requirements are to be considered in detail. If requirements are to be ignored, deselect them.
- Then click Continue to start the import process.
After the import has been completed, the Log button is activated. Click on the button to open the log.
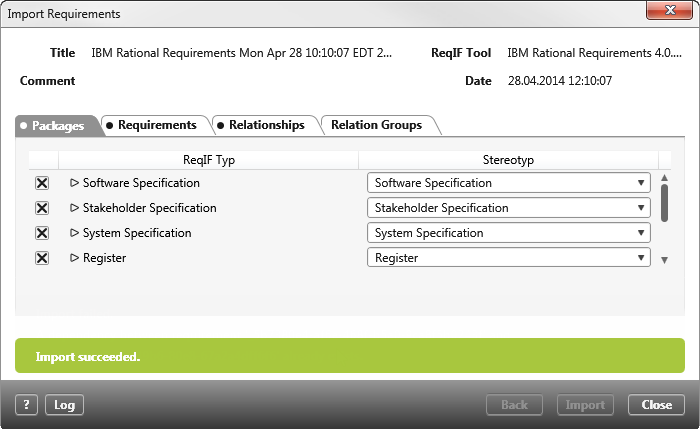
You can find the requirements, specifications, and so on in the specified packages.
Exporting requirements
- Within a project, switch to the backstage menu and choose Export/ Export requirements.
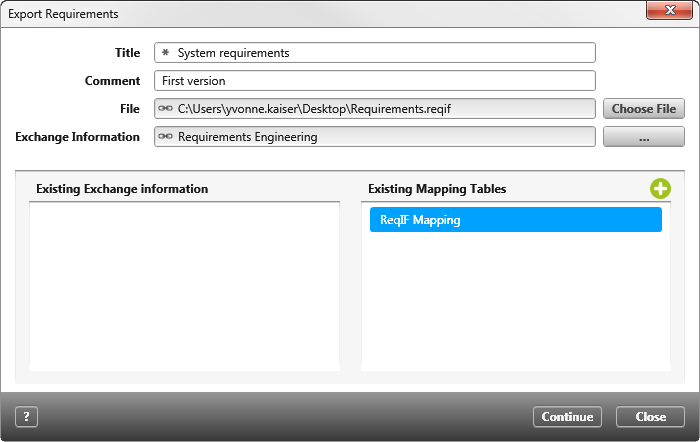
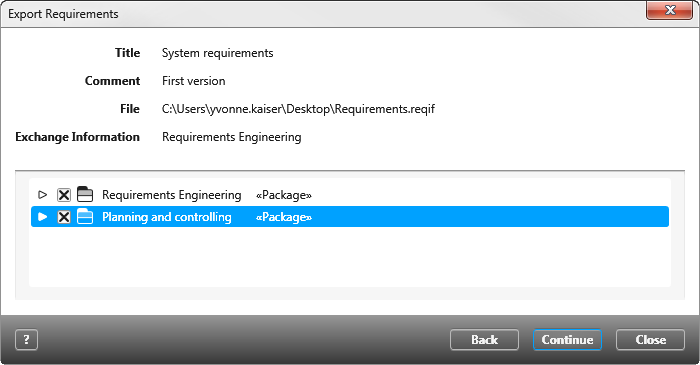
- The first step is to define the ReqIF file. Name the file, enter a comment if necessary, determine the storage location for the file and specify where the exchange information file is to be stored in objectiF RM.
- Select a transfer file. If you are exporting for the first time, the field under Existing Exchange information is empty. The export creates a transfer file that you can select when exporting again.
- Under Existing Mapping Tables, select a mapping table. If the field is empty, use the plus button to create a mapping table. By default, a mapping table with the name ReqIF Mapping is created. You can change the name by double-clicking ReqIF Mapping.
If you do not want to use the image tables, remove them by clicking the Delete button. - Click Next.
- In the second step, you select the packages with the requirements or specifications that you want to export. The system displays the packages that contain elements that can be exported to a ReqIF file.
- Then click Continue.
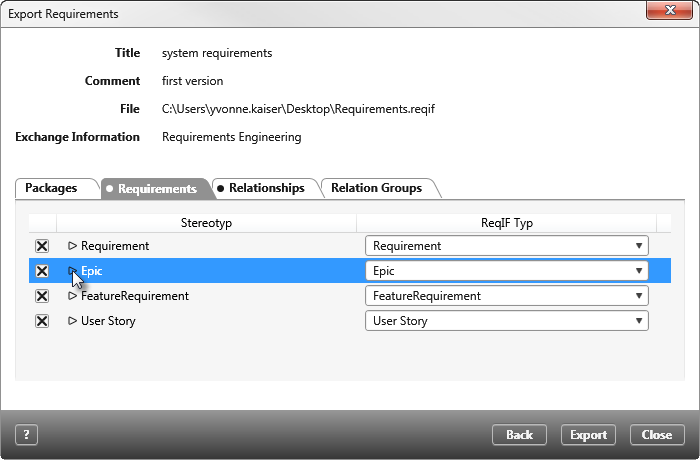
- In the next dialog box, select the properties and attributes that you want to export. In the individual tab pages, specify which properties are to be exported and map the stereotypes and attributes. On the left, you see all possible stereotypes that contain the requirements. You can assign these to the ReqIF types on the right by selecting the corresponding ReqIF type from the dropdown menu. Use the checkboxes to select or deselect stereotypes and property types.
- Then click Export.
- If the requirements were exported successfully, close the dialog by choosing Close.
Create specification
A specification can be regarded as a container that contains subordinate requirements, such as refinements, and maps its structure as a hierarchy.
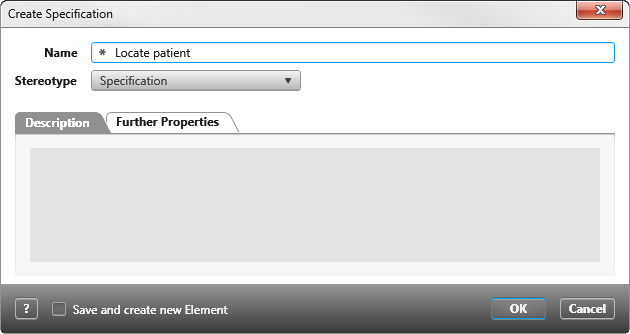
- From the context menu of a package, execute the command Create/ Specification.
- Enter a name for the specification and, if necessary, a description.
- The newly created specification is a view that you double-click to open.

- Add requirements using Drag & Drop. You can arrange the requirements as you wish. Nested, as a simple list, or you can reproduce the structure of a specification document with chapters.

You have the option of changing the contents of a specification at a later date. You can delete requirements by choosing Delete from the context menu of a requirement. You can change the order of the requirements by using Drag&Drop to move requirements to another location. It is possible to exchange existing requirements by opening the editing dialog of the hierarchy and replacing the requirement under Requirement.
Saving relationships between requirements
You can combine and save the existing relationships between the requirements in a specification.
- From the context menu of a package, choose Create/ Relationship Group.
- In the dialog box that appears, specify a source and target specification, and on the Relationships tab, use the plus button to select the relationships that you want to copy and save.
- Save and close the dialog with OK.