Dialog „Service Manager“
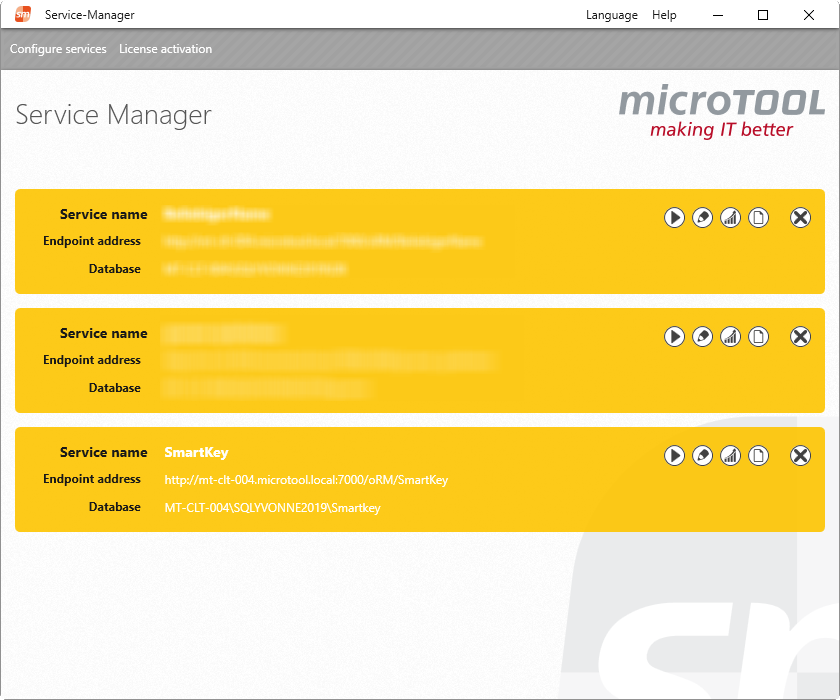
The Service Manager displays all the services that have been created so far. You can recognize the status of the services created by their colored markings. You can create, delete, or edit additional services, for example, to connect them to another database, change the name, or adjust the user logon. The dialog also provides you with options for activating your licenses or starting the DatabaseUpgrader.
The Service Manager is called:
- via the Windows Start menu
Dialog
Menu „Configure services“
Create new service Opens the Service Configuration dialog in which you can create a new service.
Refresh services Updates the status of the existing services.
Upgrade services Calls the DatabaseUgrader tool that you use to update your existing databases.
Start/Stop service Starts or stops the objectiF RPM Server in the windows services. This means that you no longer have to call the program from the windows start menu and can then change your logon data directly using the Change service credentials command.
Change service credentials You can use this command to change the logon data for the objectiF RPM service.
Exit Service Manager Closes the service manager.
Menu „Licence activation“
Activate product license Opens a dialog where you can enter the activation key you received from us and activate your license.
Open license server web-admin Opens a page of the license server (WIBU Systems CodeMeter) where you can see which licenses are available on the server and which are active.
Activate product license manually If the computer on which you installed objectiF RPM Server does not have an Internet connection, you can also activate your licenses manually. The menu item opens a dialog that presents the necessary information and work steps. The Service Manager displays the status of the defined services with a marker.
|
Yellow indicates that the service is ready but not yet running. To start the service, click on the arrow button. The service then connects to the database. Click on the pencil to open the configuration dialog for the service. Here you can change various settings, specify an e-mail server for sending e-mails from the application or activate Node.js for advanced functions. Starting with version 6.3, you can save system statistics of the database to a file by clicking the statistics symbol. If you no longer need the service, you can delete the service by clicking on the X. |
|
|
Green indicates that the service is running. The stop button stops the service and the connection to the database is terminated. Starting with version 6.3 you can open the configuration dialog in read mode by clicking the eye. The statistics icon allows you to save system statistics of the database to a file. |
|
| Blue indicates that the service is currently connecting to the database or terminating an existing connection. No other action is possible during this process. | |
|
Grey indicates that the service cannot be started. First refresh the dialog with the F5 key or use the command Refresh overview command. If there are still greyed-out services in the dialog, the WCF service may have been stopped. In this case, open the Windows Services window and restart the service. You can open the Services window directly via the Windows Start button or via Control Panel\System and Security\Administrative Tools\Computer Management\Services and Applications\Services. Starting with version 6.3, you can save system statistics of the database to a file using the statistics icon. |