
Create state transition
A state machine consists of a start point and an end point as well as various states that are connected by state transitions. Each state describes a specific phase or situation that an element can be in. The state transitions define how an element moves from one state to the next. In addition, conditions and actions can be linked to both states and state transitions.
Guards specify the requirements under which a transition is permitted. Actions define what is to be executed automatically when an element transitions to a new state – for example, setting a value, sending an email, or creating a log entry. In this way, structured, rule-based workflows can be modeled.
Create states
A state is a “status” that generally describes the current processing state of an element. Typical examples of common states are in progress or realized. All states that an element can assume are modeled in a state diagram.
- Open a state diagram using the Show context menu command or by double-clicking it.
An (empty) diagram opens in the center of the screen. Now model the states with a start point and an end point. - To do this, click the Create State button in the toolbar on the right and then click the diagram background.
The state editing dialog opens. - Name the state and assign an icon to the state by clicking the gray button to the left of the name.
- Save with OK.
- Repeat steps 2 and 3 until all states have been created.
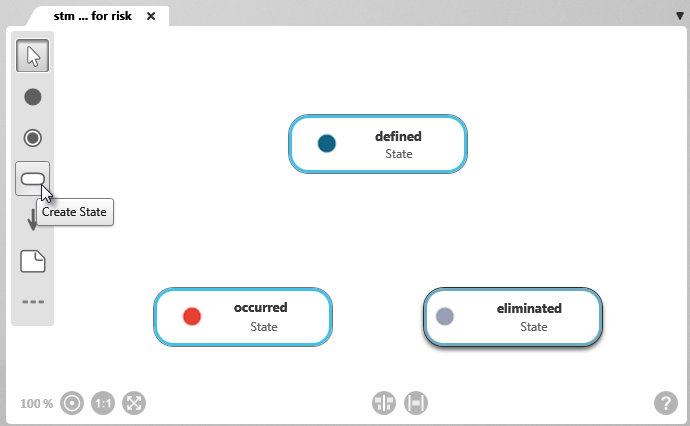
- Now create a start point by clicking the Create Initial state button in the toolbar and then clicking the diagram background to place it.
Note that only one start state can be created. - Finally, create the end state by clicking the Create Final state button and then clicking the diagram background.
You can define multiple end states.
Create state transition
State transitions determine to which states an element or artifact can change.
- Create state transitions by clicking the Create Transition button in the toolbar and then connecting the desired states by first clicking one state and then another. The arrow indicates the direction of the state change.
If you want an element to be able to return to its previous state, create a second state transition with the arrow pointing in the opposite direction.
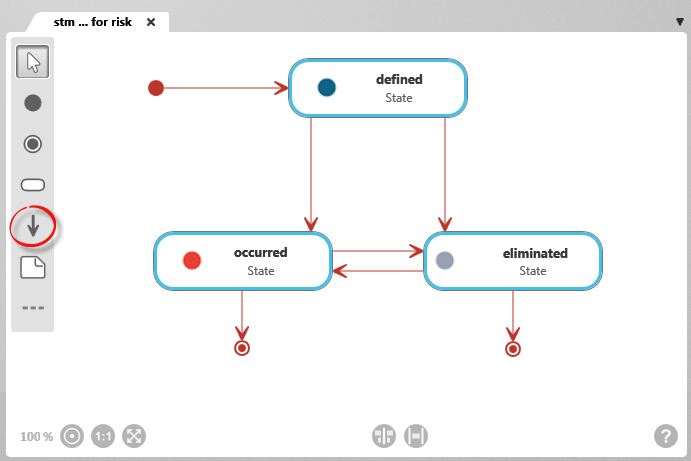
- Name the state transitions by right-clicking on the red line and selecting Edit.

- Click on the Plus button and enter a name of your choice.
- Confirm with OK.

The name of the transition appears above the red connecting line and can be moved as desired.
Repeat this step for each individual state.
Created events can be used multiple times. If you want to specify an existing event, click the blue arrow button in the state transition editing dialog and select the event to be displayed from the list.
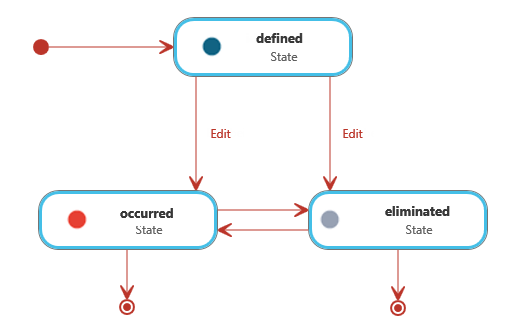
Define guards
Guards control whether a state change is permitted or denied. For example, they check whether the user performing the change is authorized to do so or whether certain artifacts linked to the element are in a defined state. Guards can be defined for both states and state transitions.
Here you can find a list of the possible guards.
- Open the state diagram by double-clicking it.
- Click on a state or a state transition and select Edit from the context menu.
- Switch to the Guards tab.
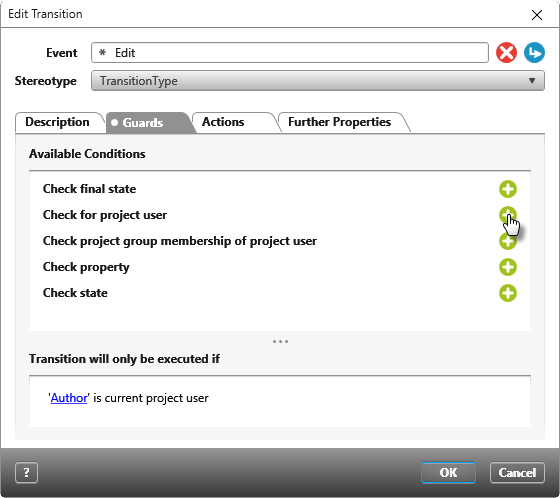
- Select the condition and then click the Plus button.
- You can then define the condition more precisely in the lower part of the tab. Underlined terms highlighted in blue indicate possible entries. Click on the underlined terms to edit the settings. If you add several conditions, they are linked with AND.
- Save with OK.
Define action
Actions are operations that are executed when an element or artifact enters or leaves a state. You can define actions for states and state transitions. Some actions can only be used once, e.g., Create revision. If such an action is selected, the Plus button is disabled.
Here you can find a list of the possible actions.
- Open the state diagram by double-clicking it.
- Click on a state or a state transition and select Edit from the context menu.
- Switch to the Actions tab.
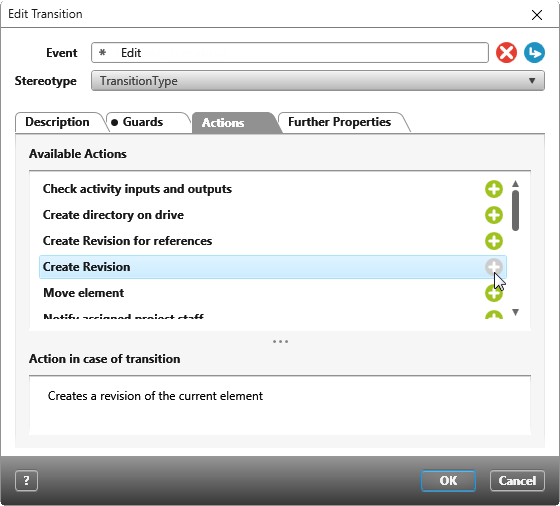
- Select the action you want to perform and click the plus button. Once an action has been selected, the button is deactivated and you can define the action more precisely in the lower part of the tab. Underlined terms highlighted in blue indicate possible entries. Click on the underlined terms to edit the settings. If you add several actions, they are linked with AND.
- Save with OK.