Create query
There are two types of queries in objectiF RM: the simple queries, which list the different properties of an entity type flatly, and the detail queries (master detail queries), which can provide further information on an entity type. You can create queries for project entities (requirements, test cases, and so on) as well as for user-defined artifacts. To create queries, you need a query type. You can then create queries based on query types.
You can use queries at any time to display all the elements that you have created in the system.
- select according to self-defined criteria,
- display as (nested) lists,
- export result list as MS Excel, MS Word or as CSV file,
- filter the results and
- edit the results.
Create simple query
You can use simple queries to, for example, list all the requirements of a package or the entire project flatly. Queries are always based on query types. A query type determines which properties are offered for an element. The tool comes with a number of predefined query types that can be used. Query types for flat lists can be identified by the name …list. If you have defined your own artifacts, you must first create a query type for the artifact.
- Open the Products window via the eye with the Show Products command.
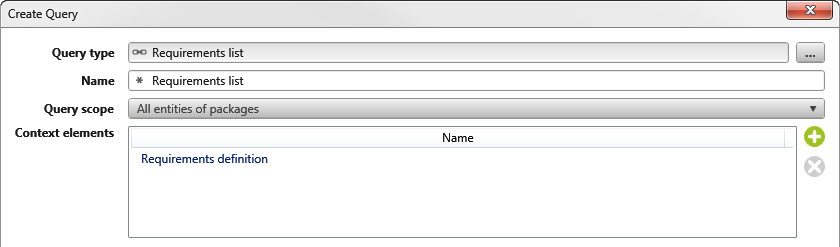
- Define a package and select the context menu command Create other/ Query.
- Select a query type for the query by clicking the […] button behind Query type.
- Navigate to the package with the query types. By default, they are found in Package Settings/ Query types.
- Overwrite the query name if you do not want to use the suggested one.
- Under Query scope, use the drop-down menu to specify what the query should evaluate. Does the query refer to the entire project or only to one package?
- Under Context elements, enter the concrete package or activity from the project.
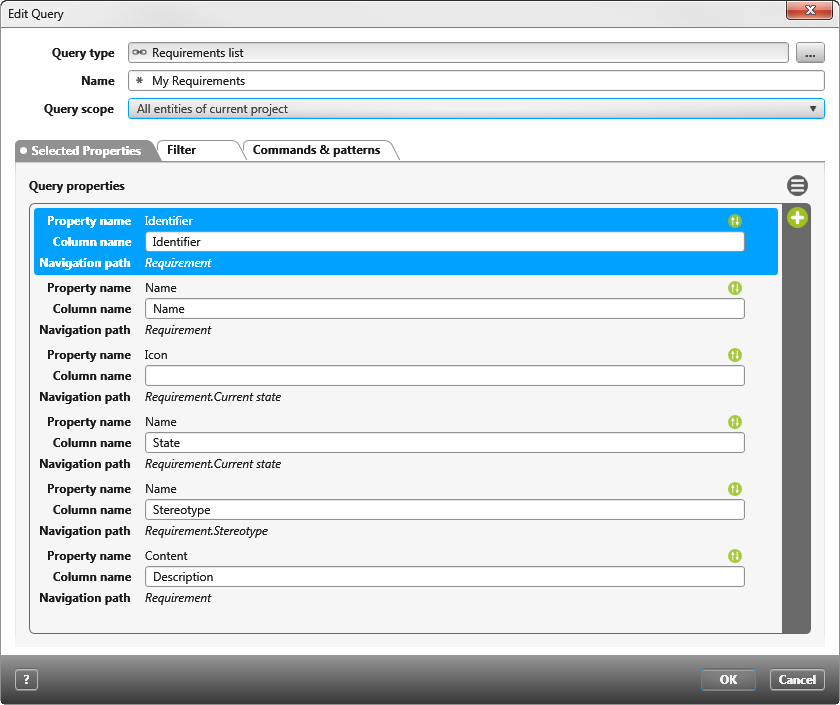
- Switch to the Selected Properties tab and use the plus button to select all the properties that you want to display.
- In the next dialog box, select the individual properties and confirm with OK.
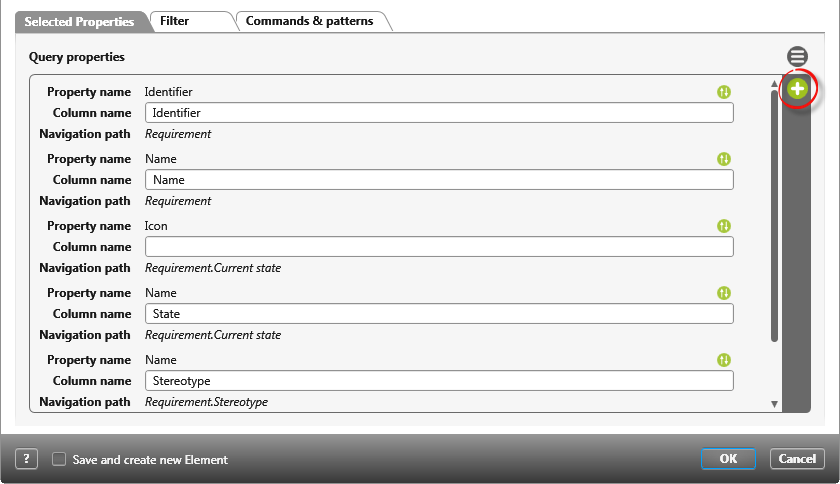
- Drag and drop the columns to the desired position…
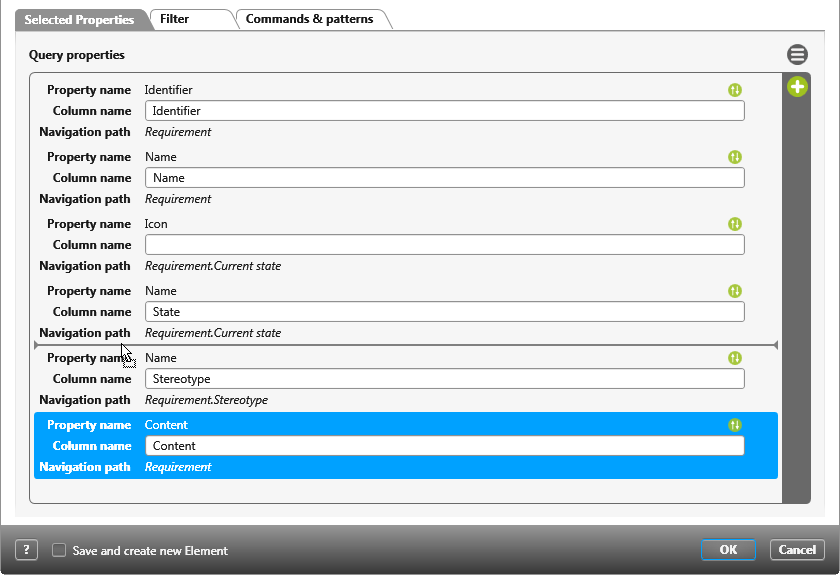
… and overwrite the column name if necessary.

- Save with OK.
Create detail-query
Queries can also display nested lists. To do this, a detail query type must be integrated in the query type used. You can recognize query types for detail queries by their names. They are, for example, Requirements with stakeholders, Documents with reviews, or Activities with developed elements. If you have defined your own artifacts and artifact relationships, you must first create a query type for the artifact.
- Open the Products window via eye with the command Show Products.
- Select a package and select the context menu command Create other/ Query.
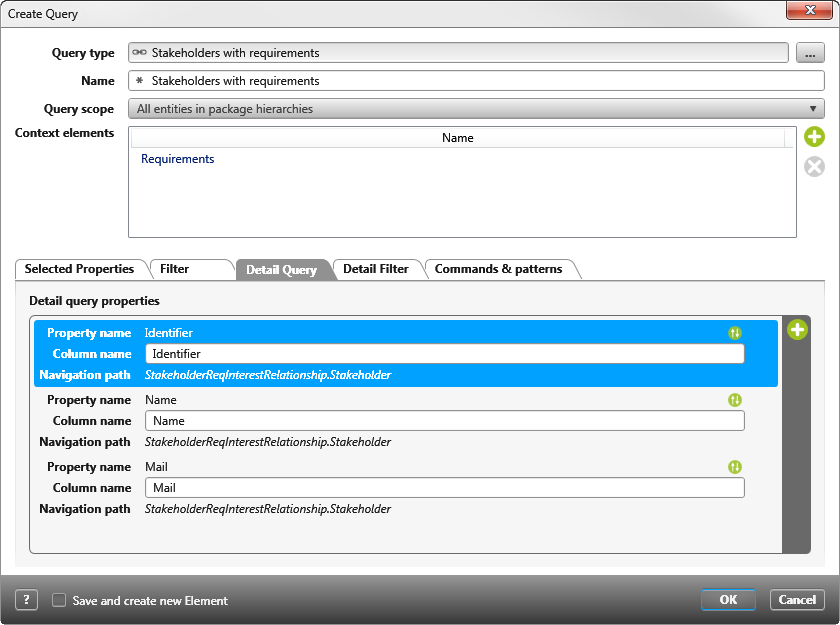
- Click on the […] button behind Query Type to select a suitable query type.
- Overwrite the name if you want to see another one.

- Under Query scope use the dropdown menu to specify what the query should evaluate. Does the query refer to the entire project or only to one package?
- Under Context elements, enter the concrete package or activity from the project. You can also specify several packages or activities here.
- Switch to the Selected Properties tab.
- Click on the plus button to select all properties to be displayed in the subsequent dialog.
- Accept the properties with OK.
- Drag and drop the columns to the desired position and change the column names if necessary.
- Switch to the Detail Query tab and repeat steps 8 and 9 for the detail query.
If you want to restrict the elements to be evaluated according to certain criteria, you can do this using Filters. To do this, switch to the Filter or Detail Filter tab page and click the plus button. There you select a filter that you want to use and specify the properties using the editable areas (underlined in blue). Some properties can be selected from a list, other properties you need to know in order to enter them.
Create query with assigned members
Requirements, test cases and activities are processed and implemented by individual users or project groups. There are tabs in the respective editing dialogs that allow you to assign project members.
- First, create a new query type using the context menu command Create other/ Query Type.
- Under Entity, choose Associated project user to test case, or Associated project user to requirement …
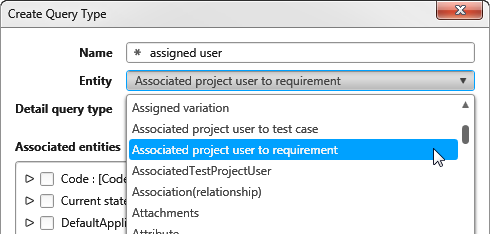
- .. and select the entry Project user/ User/ Database user under Associated entities.

- Confirm the settings with OK.
Creating a second query type
- Create a new query type. For the Entity choose Requirement and for Detail query type choose the previously created query type.
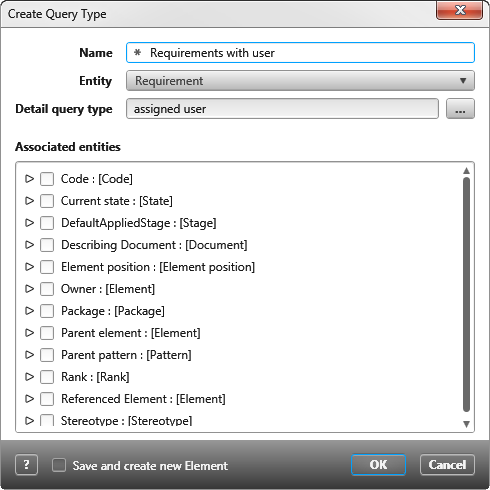
- Confirm the settings with OK.
Create query
- Create a new query with Create other/ Query based on the second query type.
- On the Selected Properties tab, use the plus button to add the Associated project users column and any others you want to see in the query.

- Now switch to the Detail Filter tab and use the plus button to create the Related Project Staff Member filter.
- Click on the blue link in the filter (select a navigation path) and select Associated project user to requirement.Project user.
- Create another filter to hide the detail rows by selecting the Property Filter filter via the plus button. Choose Associated project user to requirement/Project user.User in the filter expression under select a navigation path. Under select a property select Name, as operator select “=” and as comparison value a 0.
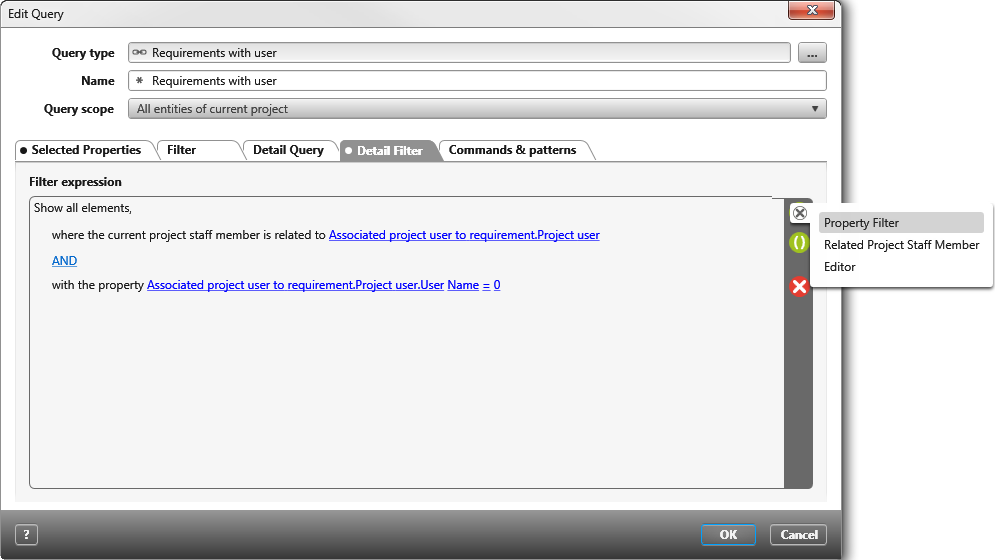
- Accept the property via OK.
When you open the query, the assigned users are displayed in a comma-separated column.
Query “My requirements…”
You can also create queries in which a logged-in user only sees the requirements, test cases, or reviews that are assigned to him or her. You can only create such queries if the element or artifact contains the Staff tab in the editing form.
- Create a new query using the context menu of a package with the command Create other / Query.
- Enter a requirement, test case, or review list under Query Type.
- Specify the scope of the query and the context element.
- On the Selected Properties tab, select the properties you want to see in the query.
- Switch to the Filter tab.
- Click the plus button and select the Related Project Staff Member filter.
- Click the blue entry and select Associated project users.
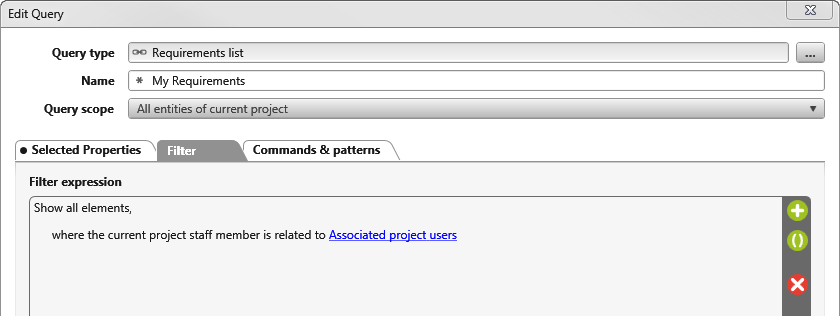
- Save with OK.