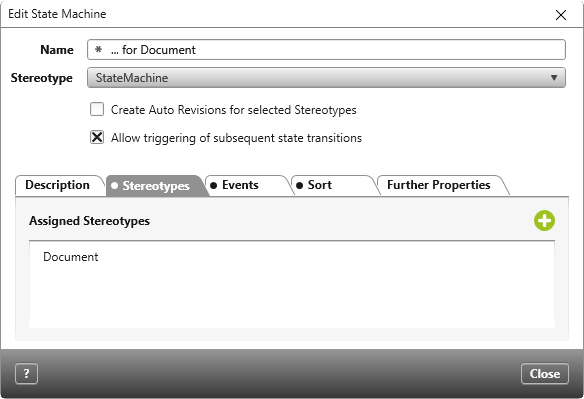
Dialog “Edit State Machine”
A state machine describes which states a product goes through and which events or conditions must be fulfilled for it to undergo a transition in state.
The dialog can be opened:
- via the context menu of a state machine with the command Edit
The dialog

Name Enter a name.
Stereotype Select a stereotype from the drop-down list. By default, the StateMachine stereotype is selected.
Create Auto Revisions for selected Stereotypes (version 5.1 and higher)
Check the option if a revision should be created automatically when the content of an element is changed.
Allow triggering of subsequent state transitions (version 7.0 and higher)
If the option is checked, all available states are offered during state changes in queries and via the context menu, according to their order in the state machine. When selecting the next state, later states can be selected, provided that conditions of the intermediate states are fulfilled. In the edit dialog, however, the triggerable events are still offered, which can lead to a state transition.
If the option is not marked, all available events (state transitions) are offered in queries and when changing states via the context menu. When selecting the next state, only the next state can be selected.
Tab “Description”
Enter a description.
Tab “Stereotypes”
The state machine applies for elements that are marked with one of the stereotypes stated here. Click the Plus sign to add further stereotypes. The state machine also applies for all substereotypes, as long as a separate state machine has not been not defined for them.
Tab “Events”
All events are listed on this tab that trigger a transition of state. You create events by creating a state transition (red line) in the state diagram and entering a name via Edit. You can also add a new event using the Plus button.
Events can depend on conditions and be associated with further actions that occur when a state is reached or exited.
If you double-click an event under Assigned Events, you can rename or delete the event.
Tab “Sort”
All states that an element can have are listed here. The order that is set here is identical to the display in queries and views. By default, these states are displayed alphabetically by name. However, this is not always the case, since you may not want to see the requirements that are in the rejected state at the top of queries and views, but are interested in requirements that have completed the state. Sort the states into the desired order using Drag & Drop or the arrow buttons.
Tab “Further Properties”
If the stereotype has so-called user-defined properties, you can enter values for them here.
