Version 6.4.1 and Later
Generate PowerPoint File With Mapping
You can generate queries, Gantt charts and user-defined properties and project properties from objectiF RPM into PowerPoint files. With version 7.1 and later, generating formatted texts and PowerPoint files with macros (*.pptm) is also supported.
Prepare PowerPoint Files
In order to generate project content into a PowerPoint file, you need a file with the corresponding bookmarks. The bookmarks Text Box and Table are supported.
- Open a PowerPoint file.
- Go to the Insert tab and click on Text Box or Table – depending on what you want to display in the document.

Define Properties
Text fields are used to generate project and user-defined properties into documents.
- Select Text Box from the menu bar and place it in the desired position in the document.

- Name and format the fields.

- Select the text box, click Format in the menu bar, and then select Selection Pane. The selection pane opens on the right-hand side, where you can enter the necessary bookmarks for the PowerPoint elements.

- Double-click a text field and enter any name in the field.

- Repeat this process with all text fields that you want to generate later.
- Save the file when you are finished with the page layout.
If text fields are to have a certain size, for example, you can format them using the context menu.
Define Queries
Queries are generated into documents via tables.
- Insert a table into the document by selecting Table from the menu bar.

- Enter the query column’s names into the table’s top line. The column headings here must match those in the query since the contents are generated by mapping into the table, however, they don’t need to be entered in the same order.

- Select the table and then click on Selection Pane in the menu bar. Rename the table however you please.

- Save the document.
Define Project Plan
Views for project plans and activity plans can be generated into PowerPoint files through the Pictures command.
- Insert an image into a PowerPoint file via its menu bar. The inserted image serves as a placeholder and is replaced when you generate content from objectiF RPM.

- Drag the image to the desired size.
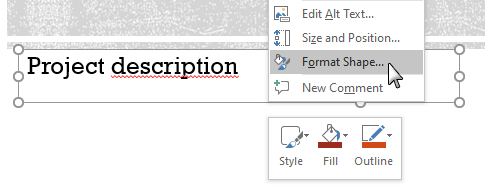
- Select the image and click Format on the menu bar to access the Selection Pane.
- Double-click the box and enter a name of your choice.

- Save the document.
Edit PowerPoint File
If you already have one or more PowerPoint files in a directory, you can edit or re-configure them later.
- Open the context menu of the file you want to edit and select Edit. Upon selecting this command, the file is checked out of the system and opens in editing mode.
- Make the desired changes and save the file.
- Re-open the file’s context menu and select Check In to apply the changes you have made. Other users will now be able to view these changes.
- Click OK in the dialog that opens.
Map Properties
If you want to generate several pages of content, they don’t all have to be generated into just one PowerPoint file; you can compile different individual PowerPoint files into one document. However, when compiling different files, you need to map out the contents before generating the compiled file.
In the following example, we see the content set to be generated defined in a file.
- Select the file and choose the command Configure PowerPoint Generation from the context menu.
Depending on which content is to be generated, carry out the mapping in the corresponding tabs.

In the Bookmarks tab, you map project and user-defined properties. If you do not use any properties, the tab remains empty.
- Click on the Plus button in the Bookmarks tab.
- Select the project in the selection dialog if it is a project property you wish to map. If you want to map user-defined properties instead, select the specific element from the project.
- In the Property column, click the […] button and select the custom property for the context element’s stereotype.

In the Tables tab, map the queries that are to be generated. If you aren’t using any queries, leave the tab empty.
- Click on the Plus button in the Tables tab and, in the selection dialog, choose which query you want to be generated.
- Enter the name you defined for the query in the PowerPoint file in the Table Name column.

In the Images tab, map the Gantt charts.
- Click on the Plus button in the Images tab and in the selection dialog that opens, choose which Gantt chart you want to be generated.
- In the Image Name column, enter the name of the view you are generating into the PowerPoint document.
- Click on the Edit button in the row if you only want to generate a section of the selected Gantt chart rather than its entirety. Another dialog opens when you select a time range.

- Click OK to save your choices.
Generate PowerPoint File
- Select a PowerPoint file with integrated and mapped bookmarks.
- Open its context menu and select Generate Content and Open.
Generate PowerPoint File From Different Files
The contents to be generated in the document do not have to be prepared in one individual document; it’s possible to combine different individual PowerPoint files into one document.
- In the context menu of the ‘main’ file (the file into which other files are going to be compiled), select the command Configure PowerPoint Generation.
- Switch to the Contained Presentations tab and click on the Plus button to add individual pages to the file. Edit the order of the pages with the blue arrow buttons if necessary.
- Save the file.
- In objectiF RPM, open the context menu of the file and select the command Generate Content and Open.
