The Search Manager
The full-text search is an optional extension that you can activate using SQL Manager. Depending on which documents are to be searched later, you must download and install the corresponding filters.
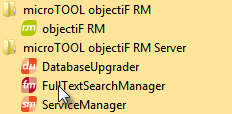
After the server installation the Search Manager is available via the Windows Start button/ microTOOL objectiF RM Server.
You will find the Search Manager:
- in the installation directory of objectiF RM
- in the Windows Start menu
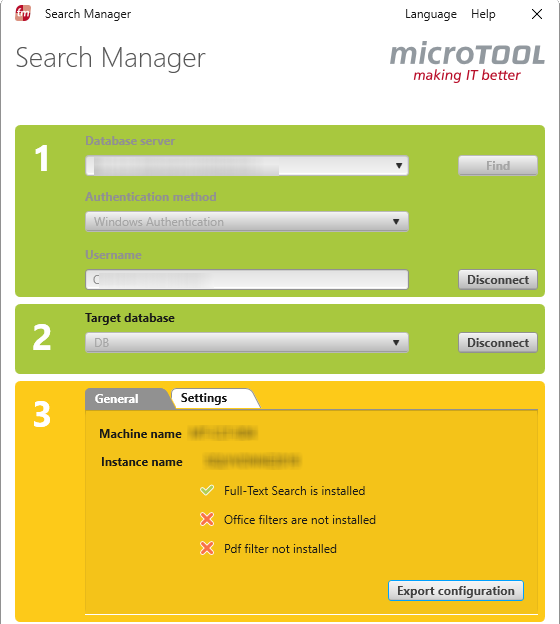
Step 1
Database server Select the local server (localhost) from the dropdown list. If the SQL server is elsewhere in the network, you can select it by choosing Find. Alternatively, you can enter the name of the server.
Find Searches the network for SQL servers. The servers found are then offered for selection via the dropdown list.
Authentication method Here you specify the method with which you want to log on to the server. The selected method must correspond to the method used on the database server. The default setting is Windows Authentication, for which no further entries are required at this point. If you switch to User with Password (Server authentication), the dialog is extended. Enter the user name and password. Note that for both authentication methods, the selected user must be entered as the user of the database server.
Connect / Disconnect Establishes the connection to the database server.
Step 2
Target database If all entries are correct, the dropdown list Target database is activated. The databases that support a full text search are offered to you. Select the database to be updated.
Connect Connects to the database.
Step 3
General
Machine name Displays the host name.
Instance name Displays the server instance for which the full text search was initiated.
Export configuration Exports the settings to an xml file.
Settings
Status Shows whether a full text index exists.
If you have already performed full-text indexing, the system displays None under Action. Choose Change Settings from the dropdown menu to update the index or make other settings.
Action Use the dropdown menu to specify how and when the full-text index is to be created.
- The None action never creates a new index.
- Rebuild creates a new index. For this option, you can use Accent to specify whether words with diacritical characters should be taken into account. Diacritical characters are dots, dashes, circles that belong to a letter. For example: ä,ü, é, Ø.
- Reorganize creates a new index from an existing one.
- Start population This option is available if you have set the Manual option under Change settings.
- The settings for full text indexing can be adjusted via Change settings.
- Language Specifies a language for the full text search. Select a language from the dropdown menu.
- Change Tracking Specifies when a new index is to be created.
- Manual must be triggered manually. If you use a new stop list, select this setting or if you do not want a new index to be created each time the database is changed. Indexing is not performed until you select the Start population option under Action. When you click Execute, indexing is performed.
- Automatic Indexing is performed automatically after changes have been made.
- Off No changes are checked.
- No population No new full text index is created – no matter whether something has changed in the database or not.
- Stoplist A stop list contains frequently used words, such as the, the, the, that are not considered in the search. This list can be customized via the SQL Server. If you want to use a stop list, select <<System>>. Select the No stop list is used option.
- Accent Select the check box if you want diacritical characters to be included in the search. This setting is only relevant if you have selected a language under Language that also uses such accented characters.
Execute takes over the settings and executes the respective action.


