Create, Edit and Delete Projects
When creating a project, it’s possible to base it on multiple project templates and create within an organization. Project templates can also be saved for future use.
Create projects
Create your projects either through the backstage menu or directly through an organization. You can use one of the project templates supplied or import a suitable template from the project catalogue.
You need administrator rights to create projects. If you do not have rights, the New Project command in the backstage menu will be disabled.
Create project through backstage menu
For administrative reasons, projects and project templates can only be created in the desktop client by a user with system administration permissions.
- Go to the backstage menu.
- Click Create/ New Project.
- Name the project and give it a short identifier, such as an abbreviation or acronym. The identifier appears in the automatically generated IDs of requirements, test cases, etc., in the project.
- Select the option Create as template to save the project as a template later on.
- Select an organization to allocate the project to.
- In the tab for Project templates, you’ll find templates that come pre-installed with objectiF RPM. In the File tab, you can select a template stored in the directory that has been based on an exported project.
If you want to use a project as a template for future projects, first save it as sxmi file. To do this, open the project you wish to create a template from, open the Backstage menu, execute the command Project/ Export/ Export to File. Then, when you want to create a new project based off that template, simply select the file in the File tab of the Create project dialog.
7. Click on Continue.
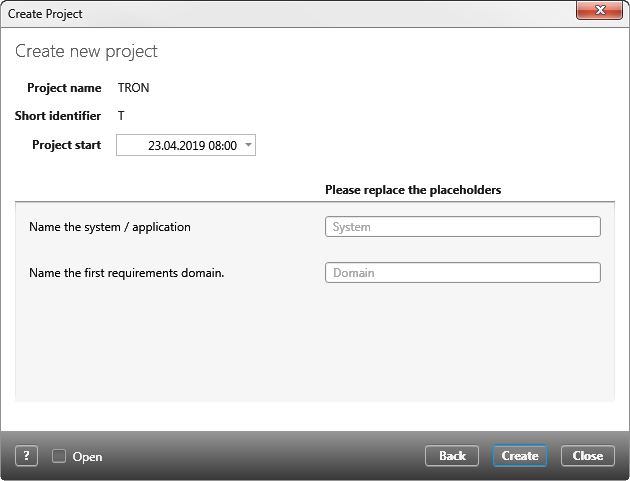
8. At the top of the following dialog, you can enter a start date in the calendar that appears in the drop-down menu for Project start.
9. Replacing the placeholders is optional. If you decide to replace them, use names according to your project-specific nomenclature. The names will be applied to artifacts that are generated by the template.
Enter the name of the domain for which the first requirements should be created. You will also need a name for the first release, the first sprint and the first team.
You can extend and adapt the placeholders.
10. Click Create to create the project. If you mark the option Open, then the project will be opened straight away.
Create project in an organization
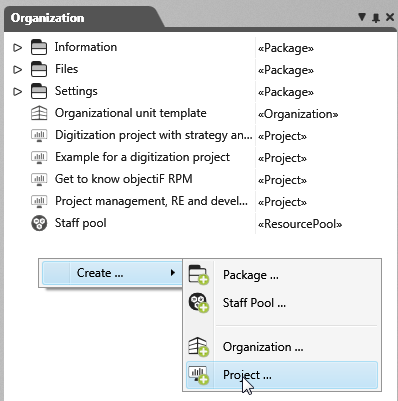
If you open the window Organization within an organization in the tool, you can also create a new project through the window’s the context menu.
- Richt-click on the background of the Organization window and select Project … from the context menu.
- A dialog will open with the same options as described above, but the new project will be allocated to the organization in which the command was executed.
Open project
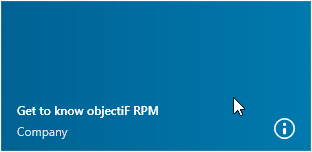
Click on the project tile in the userboard to open a project. There are also other ways to open a project.
Users cannot open a project until they are assigned to that project.
Open project in an organization
If you open the Organization window within an organization, you can also open a project via the Open Project context menu.
Open project in the roadmap
- Go to an organization and open the roadmap via the topic bar.
- Select a project milestone and click the Show Project button
Edit project properties
Each project has properties that are either manually defined when a project is created or are automatically generated. These can be changed.
- Open the project whose properties you want to change.
- Go to the backstage menu and select Project/ Properties.
Delete project
Projects can only be deleted by users with administrator rights, such as the database administrator, organization administrator and the project administrator.
As of version 7.5.1, the Delete command in the backstage menu is deactivated by default to prevent accidental deletion.
Cancel deletion protection
- Open the project you want to delete.
- Go to the backstage menu and open the properties dialog by clicking on Project/ Properties.
- Switch to tab Settings and deselect the Allow deletion of the project option.
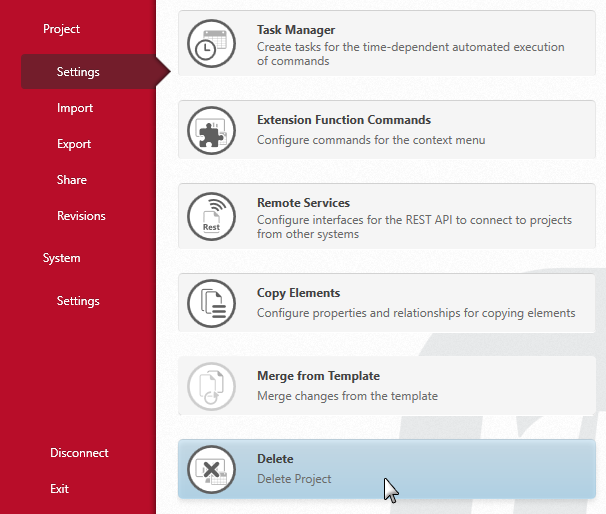
- Click Project/ Settings/ Delete in the backstage menu.
A confirmation message will appear when the project has been successfully deleted.


