Create pattern
Any user with administrator rights or who has access to the Settings window can create patterns.
Create pattern
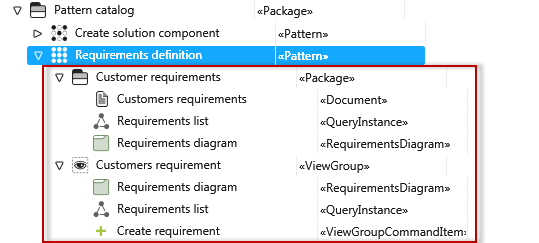
The following example creates a sample that includes a package for requirements, a requirements document, a query for the requirements, and a diagram for the requirements. To do this, the template automatically creates a new topic for the Topic bar that references the requirements diagram and query, as well as a command to create requirements.
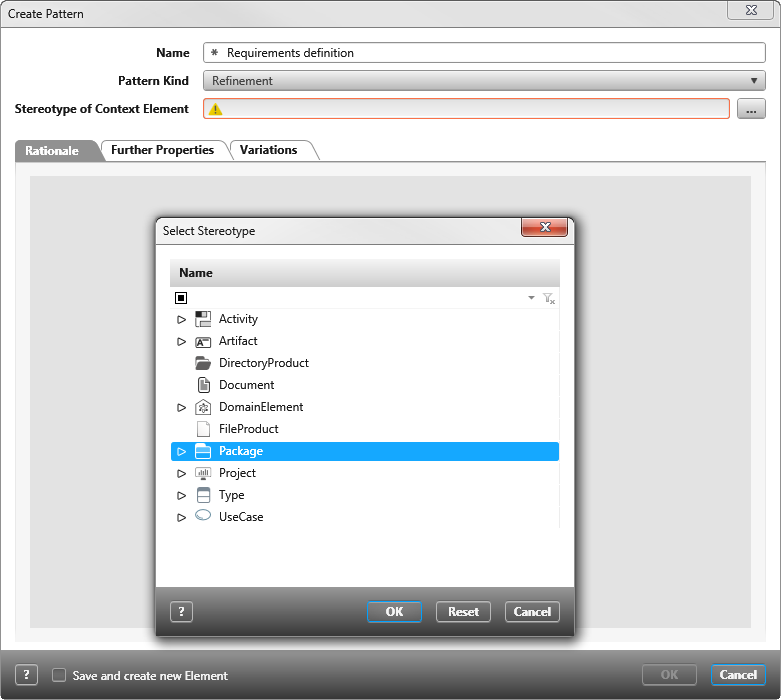
- In the context menu of a package, select the command Create other/ Pattern.
- Name the pattern and select the stereotype to which the pattern is to be applied later under Stereotype of Context Element.
- Under Pattern Kind, specify whether the pattern should refine or extend. You also have the option of selecting Refinement and Extension.
Hint
Patterns can be created as refinement patterns or extension patterns.
If you want to assign further child elements to an element in objectiF RM – these could be documents, for example, which are to be created as “child elements” in a directory – then select Refinement.
If you want to create additional elements for an existing element that are related to each other (but are not child elements), select the Extension type. For example, this could be requirements that are derived.
If you already have experience with creating patterns, you can also select Extension and Refinement to be able to use a pattern flexibly.
- Enter a description so that the following user knows what the pattern is good for.
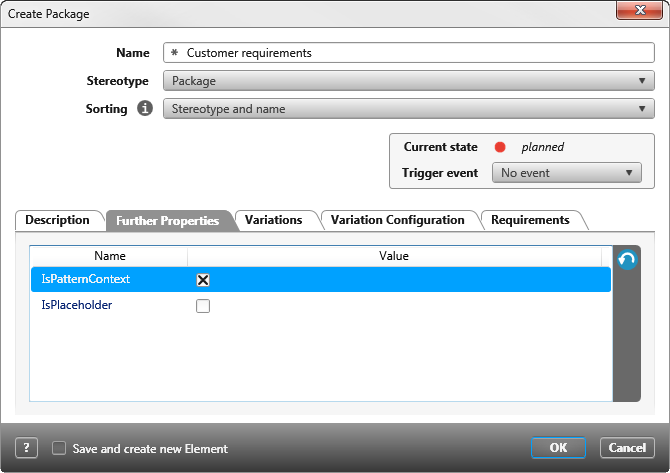
- Click OK to create the design. The next step is to define the contents of the design. Create the elements that you want the pattern to contain individually. For the example, we need a requirement, a query, a document, a placeholder for the topic group, and the commands that represent the elements to be created later in the project.
- Give the package a name and select the IsPatternContext check box on the Further Properties tab. This ensures that the pattern is only offered in the context of a package with the specified stereotype.
- Create all other elements that you want the design to create. If you specify context elements, make sure that you refer to the elements in the pattern and not to elements that exist in a project.
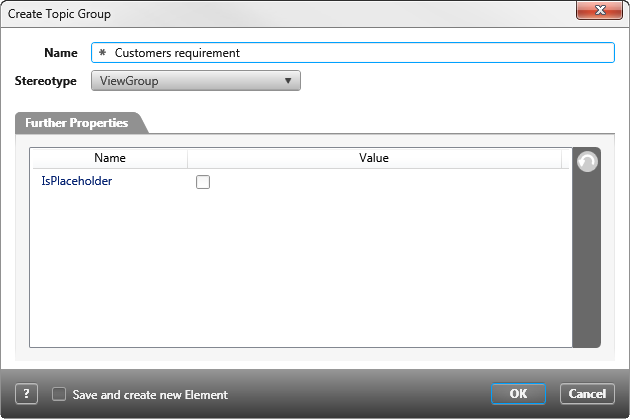
- To create a new topic in the topic bar, use the context menu of the pattern to select the command Create other/ Topic Group.
- Specify the name of the topic.
- Select the topic group you just created and select the command Create other/ Topic Group element from the context menu in order to select the elements to be referenced and displayed in the topic in the following selection dialog. Make sure that you select elements from the pattern and not from the project.
- Select the topic group and use the context menu command Create other/ Topic Group command.

- Confirm the entries with OK.
The pattern can now be applied via the context menu of an existing package with the command Apply Pattern/ [your pattern].
Create description and tooltips for a pattern
When you create a pattern, you can store a description for the pattern and tooltips for the individual pattern elements. These tooltips are then displayed in the configuration dialog in the form of tooltips when you apply the pattern.
Enter description
- Open the pattern by double-clicking it or using the Edit context menu command.
- Enter a text on the Description tab page.
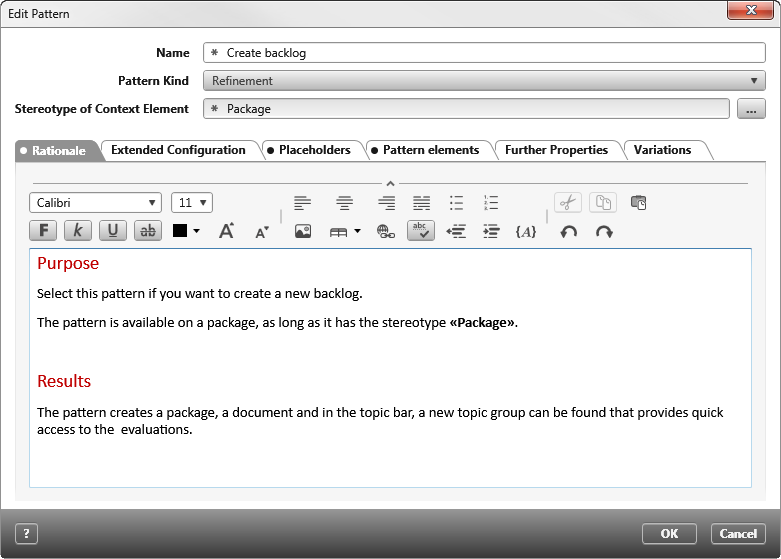
- Click OK.
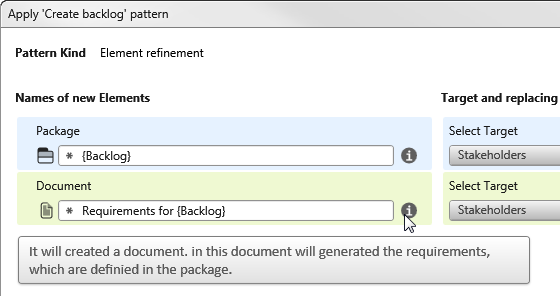
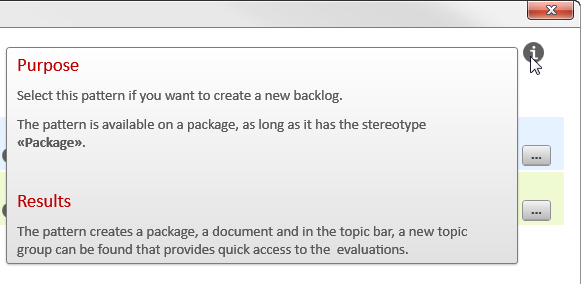
When you apply the pattern, the description is displayed when you hover the mouse over the i icon.
Enter tooltips
- Open the pattern by double-clicking it or using the Edit context menu command.
- Switch to the tab Pattern elements.
You can define a tooltip for each design element. - In the Label field, you can see the name of the pattern element – in gray – that can be overwritten.
- In the Description field, enter a description for the pattern element.
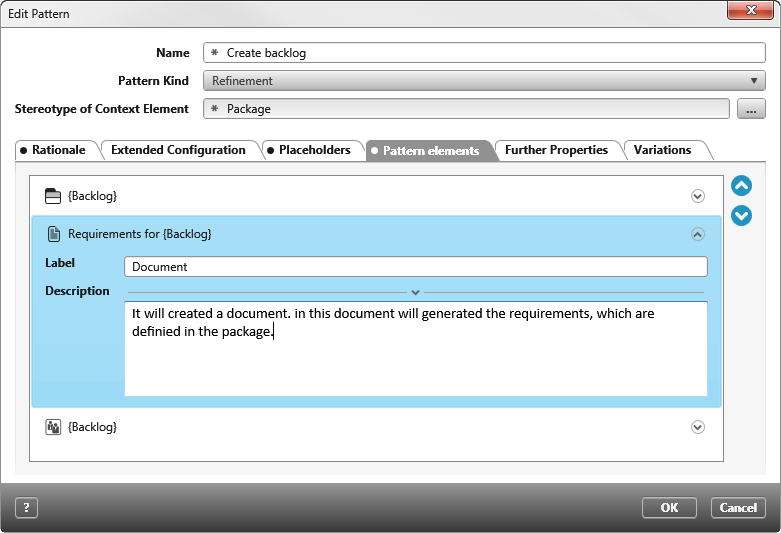
- Click OK.
When applying the pattern, the description is displayed behind each pattern element when you move the mouse over the i symbol.