Using placeholder in a pattern
You can define placeholders in your pattern to include properties (project properties, custom properties) such as name, date, or notes, which are then automatically inserted into the name or description when you apply the pattern.
See Useable placeholders for a list of placeholders that can be used.
Create pattern with placeholder
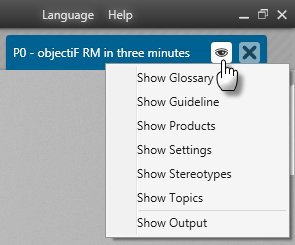
- Open the Settings window via Show/ Show Settings.
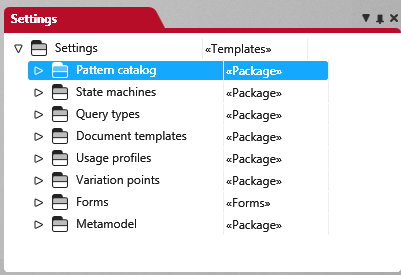
- In package Pattern catalog, select a package or create a new package.
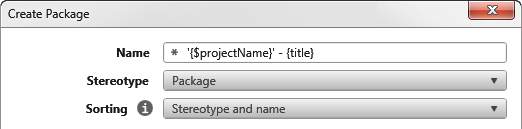
- In the package, use the context menu Create other/ Pattern… to create a new pattern. Enter a name for the pattern and select a stereotype.
The stereotype always depends on the artifact to which the pattern is to be applied later. For example, if you want to apply the pattern to an activity, choose the Activity stereotype in the Create Pattern dialog. The pattern is then made available in the context menu of an activity.
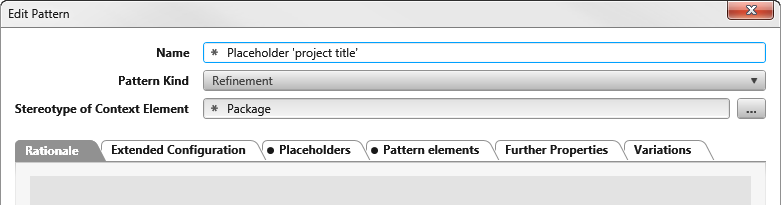
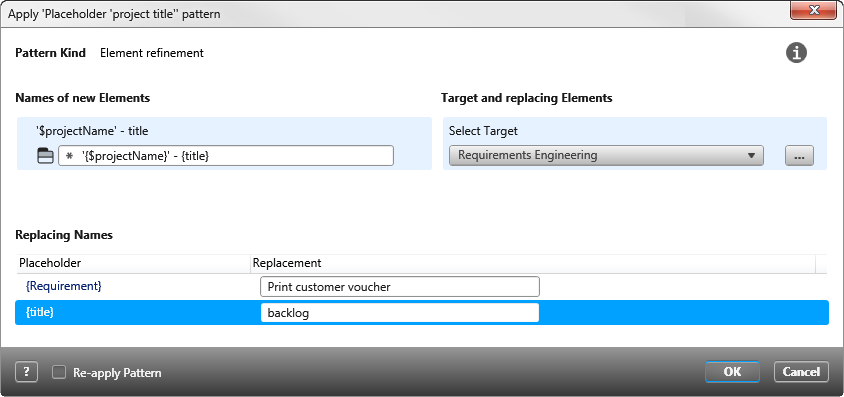
- Select the pattern and create another package via the context menu. Enter a “placeholder” as the name, which is to be generated later via the pattern.
- Click OK and switch to your project.
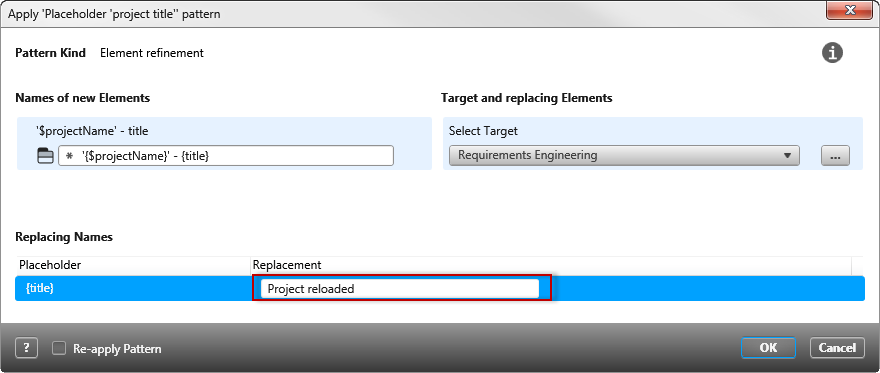
- Create a package there and select Apply Pattern/ [Created Pattern] from the context menu.
- Replace the placeholder under Replacing Names and confirm with OK.
If you have defined child elements in the pattern, these elements are not displayed in the Pattern Configuration dialog.
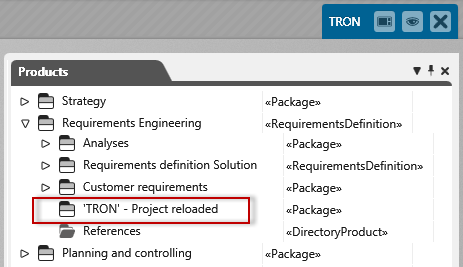
A new package is created in the project with the name defined in the pattern.
Usable placeholders
You can also use placeholders in patterns, which you will later replace with concrete names when you apply the pattern.
If you format placeholders, make sure that the entire placeholder receives the formatting, otherwise it will not work.
| Automatically generated placeholders | Note |
| Name of organization = {$organizationName} | |
| Id of organization = {$organizationId} | |
| Name of project = {$projectName} | |
| Id of project = {$projectId} | |
| current date with time = {$timestamp} | |
| current date = {$shortDate} | |
| ID of element = {$identifier} | |
| Name of element = {$name} | |
| current user = {$userName} | |
| Name of the element to which the pattern is applied (version 8.6 and higher) = {$contextName} |
|
| Name of the parent element (package, requirement, etc.) to which the pattern is applied (version 8.6 and higher) = {$contextParentName} |
|
| Name of the element that is selected as the target package (version 8.6 and higher) = {$targetName} |
Placeholders with their own replacements
Name of artefact = {Title}
Using a placeholder when creating new elements
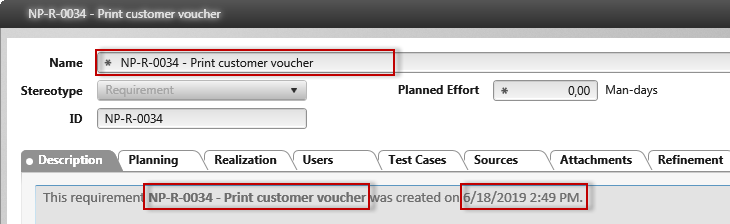
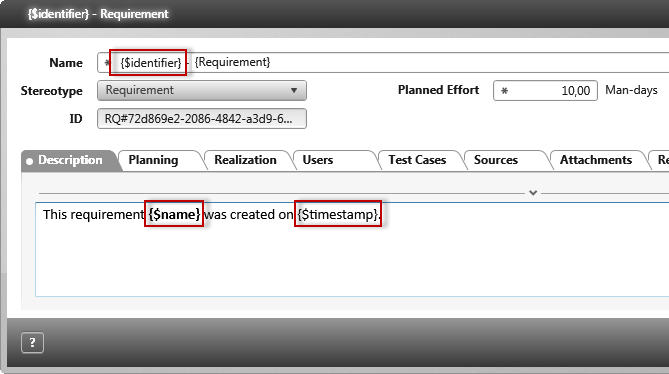
objectiF RM offers you three placeholders that are generated and replaced by the system: ID of the element, name of the element and the date when the element was created.
This gives you the opportunity to
- the generated ID of an element in the name
- the name and generated ID of the new element in the description text, and
- the time (date and time) of creation
take over.
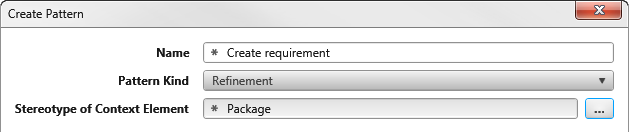
- Create a new pattern from the context menu of a package with Create other/Pattern.
- Name the pattern and specify the stereotype to which the pattern is to be applied later under Stereotype of Context Element.
- Use the context menu of the pattern to create elements that the design is to create later.
If you create elements in the pattern that are to have relationships with each other, make sure that you only assign the pattern elements from the pattern when assigning them.
- Open the editing dialog of the element and enter dynamic placeholders in the name field or in the description field.
- If you now apply the pattern, all you need to do is overwrite the requirement name and select a package where to place the new requirement. By default, the package to which you applied the pattern is selected.
- Click OK.
The pattern creates the elements and overwrites the defined placeholders with the values.