Create, edit and delete a user
It is important that all users who want to work with objectiF RPM are registered as users.This is done by an administrator who has the following options:
- Manual creation
- Importing from the Active Directory
- Import from the Active Directory via task
Creating users
As a database administrator, you can manage additional users via the backstage menu with the System/ User Management command.
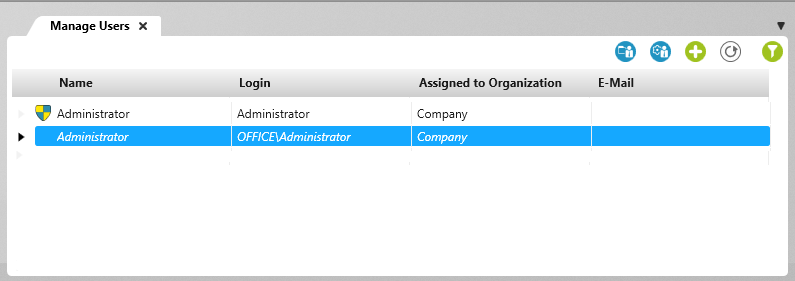
The view contains all created users that were created within the main organization or that exist in your database. If you create additional organizations, the users created in the main organization are also made available here.
You can create users manually or import all users from an Active Directory. When creating a new user, you enter data for the login or the e-mail address and mark whether it is a “normal” user or whether it should be given additional rights by default. If you import users, you can specify this data using the Edit context menu command.
Creating users manually
Users who are created automatically receive the right to log in to objectiF RPM and, if tutorial projects are available, to open them.
- Click on the plus sign to create a new user.
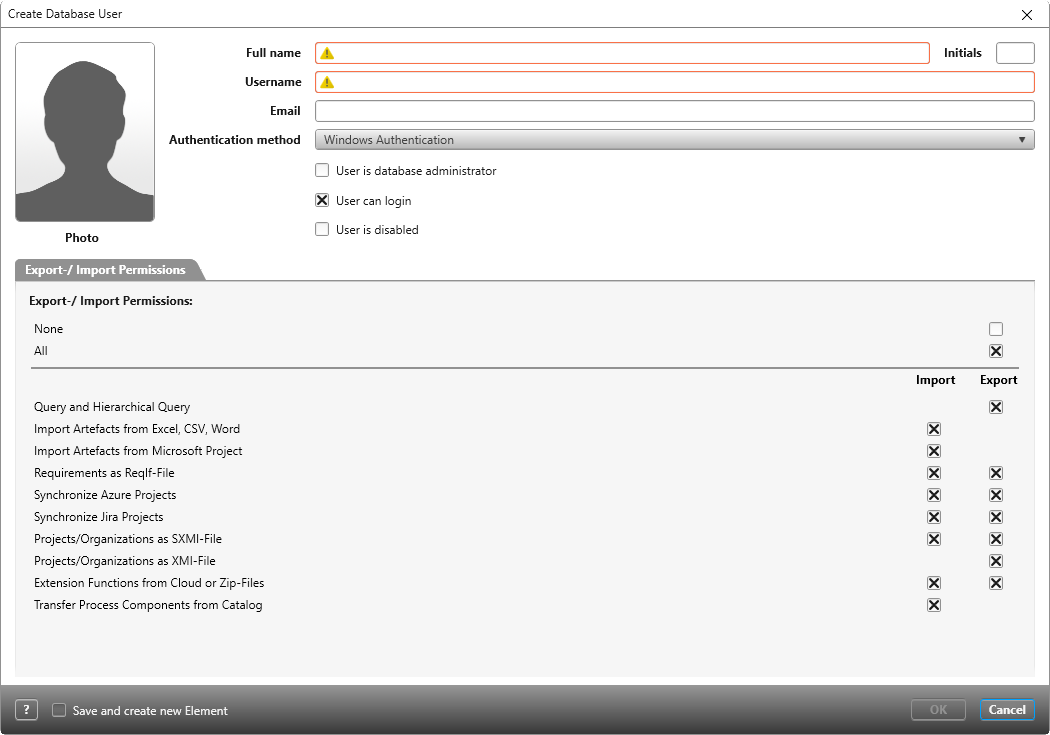
The Create Database User dialog opens.
- Full name and Username are mandatory fields. Enter a name and a user name here.
- Select an authentication method from the drop-down menu.
- If necessary, select further options and save.
The newly created user appears in the view.
Importing users via active directory
Users can also be imported from the Active Directory into an objectiF RPM system. By default, user data such as name, initials, email address, telephone and cell phone are imported from the Active Directory.
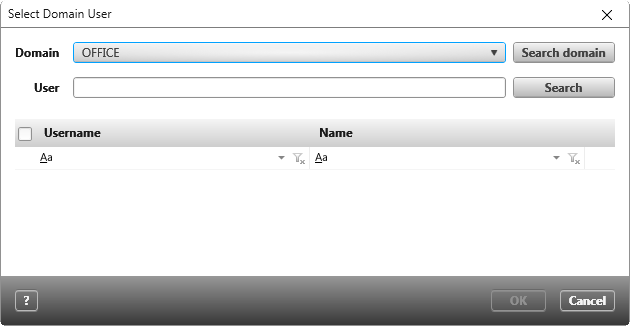
- In the view, click on the Add a new user from the Active Directory button.
- In the following dialog select a domain and then click on Search behind the User field.
- Select the users to be transferred.
- Click OK.
Making users database users
Database administrators (system administrators) have unlimited rights (provided they are not restricted by functional areas and authorizations) and can, for example, create, edit and delete organizations and projects within an objectiF RPM system. Furthermore, they are authorized to create users, employees and project members and have access to the administrative areas via the backstage menu.
- Call up the Manage Users view via the backstage menu by clicking on System/ User Management.
- Select the user who is to receive database administrator rights and select the Edit command from the context menu.
- In the subsequent dialog, select the User is database administrator option.
- Make your changes and save with OK.
In the view, the user is identified as an administrator by the Administrator icon (shield).
Deactivating users
Users who are deactivated cannot open projects to which they are assigned and are no longer offered in selection dialogs.
- Click in the backstage menu on the command System/ User Management.
- Select a user in the view and choose the command Edit from the context menu.
The Edit database user dialog opens. - Select the User is disabled option and deactivate the User can login option.
- Save the changes.
In the view, deactivated users are displayed in gray and italics. This also applies to the Organization Staff and Manage Project Staff views.
Deleting users
Users belonging to project elements cannot be deleted. First remove the user from the project before you delete it.
- Click in the backstage menu on the command System/ User Management.
- Select a user in the view and choose the command Delete from the context menu.
- Confirm the confirmation prompt.


