
Revision and History
Automatic revisions
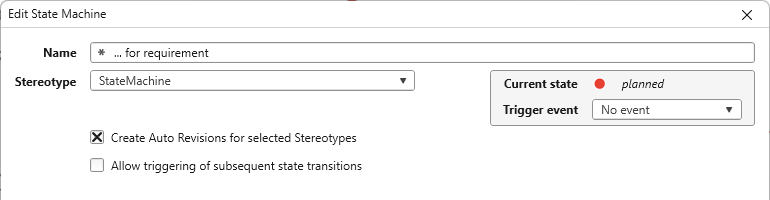
When users create a new element, an initial revision is created automatically. In addition, revisions can also be generated automatically by state machines during ongoing project operation. To configure this, open the state machine editing dialog and select the Automatically creates revisions for the selected stereotypes option. This automatically creates a new revision when content changes are made to elements of these stereotypes.
Manual revisions
Before making major changes to a file or an element, you can create a revision manually to save the current state. This is done via the context menu of the respective element using the Edit Revisions → Create Revision command.
Display revisions
All existing revisions of an element can be viewed using the Edit Revisions → Show History command. There you can see when revisions were created and by whom.
Compare revisions
If you create revisions regularly, you can see at any time who changed what and when. In the History dialog, you can use the Compare button to compare either the current state with an earlier revision or two revisions with each other. This allows you to see exactly what changes have been made to an element in the meantime.
Compare the current state with a revision
To determine the differences between the current state of an element and an earlier revision, open the element’s context menu and select Edit Revisions → Show History. Select the desired revision and click the Compare button. The system analyzes both states and displays the changes made in a dialog. If there are no differences, a corresponding message is displayed in the History dialog.
Compare two revisions
If you want to compare two revisions directly with each other, open the Edit Revisions → Show History command via the context menu of the element. Select the first revision, hold down the Shift key, and then select the second revision. Both revisions are now selected. Click the Compare button to display the differences between the two versions. If there are no differences, this is also displayed in the History dialog.
Restore revisions
If you determine that an earlier state needs to be restored, select the revision and choose the Restore command from the context menu. When restoring, the current editing state of the element is replaced by the state of the revision.
Export revisions
You can save a revision to an *.sxmi file using the Export command from the context menu.
Publish revisions
If you create revisions for a project or a project template, you can use the Publish command from the context menu to release a specific state, which can then be used when creating new projects.