Create and customize templates
A project template reduces the effort and time you would normally spend creating new projects. When a new project is created, the settings, patterns and state machines contained within the selected project template are automatically transferred to the new project. By default, objectiF RPM contains pre-built project templates that you can use for new projects. You can, however, create your own customized project templates.
Create project template
Templates are always based on either pre-existing project templates or actual projects. If you want to create a project template based on an existing project, export the (complete) project as a sxmi file through the Backstage menu.
- Create a new project template through the backstage menu by selecting Create / New Project.
- Name the template and enter an abbreviation for the project.
- Select the option Create as template.
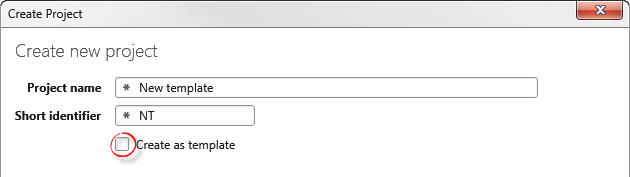
- In the section for Create in, select the organization that the template will be used for.
- If you wish to use an already existing project template in the tool, click on the Project templates tab. If the project template is an external file, go to the File tab.
- Click Create.
Once the template has been created, the system issues a confirmation message. The project template will appear as a gray tile in the userboard.

Import project template
microTOOL provides you with pre-built project templates stored in an Amazon cloud, which can be downloaded and imported.
- Go to the backstage menu and select Create / Import project template from catalog.
- In the following dialog, click the button next to Available project templates to load all available templates.
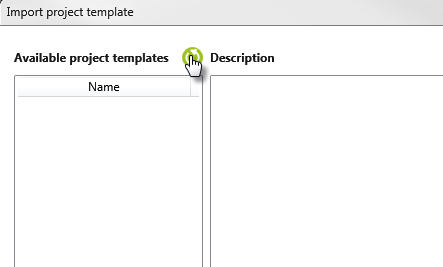
Available project templates are displayed in the Name column. To the right, you will find a description of the template.
- Select a template and click Import.
The project template is now available in the system.
Modify project template and implement changes in project
If any changes are made to a project template that has already been used as the basis for a project, these changes can also be subsequently implemented in that project.
- Open a project.
- In the backstage menu, click Project/ Merge from Template.
- In the following dialog Differences between Template and Project, you can see which data has been added (in green) to the opened project, which data does not exist in the template or has been deleted (red) and which differences in data there are (yellow).
- Select the new elements and/or the changed ones and click Continue. The changes are now implemented in the project.
Configuration: Replace placeholder with project-specific names
In the second step of creating a project, you can individually specify the names of packages, diagrams, activities etc., which will replace placeholders. When the project has been fu created, the placeholders are automatically replaced by the new given names.
It’s up to you to decide which names will replace the placeholders. Consider beforehand which placeholders are needed, and in the names of elements, documents, diagrams, etc. where the placeholder is to be replaced, write the placeholder’s name in curly brackets.

To ensure that the placeholders are replaced by the names specified in the previous section, you must first specify the placeholder in an xml text.
- Open the project template.
- In the Backstage menu, execute the command Project/ Edit configurations.
- In the following dialog, specify which placeholders should be replaced by which specific names.
- Copy and paste a line beginning with <Placeholder… in order to extend the xml’s remit to placeholders.
- Overwrite the red parts of the text with the corresponding content.
The Name refers to the placeholder from the template. The RequestReplacement, on the other hand, determines whether or not the text should be displayed (true= displayed and false= not displayed).
Communicate with future users what should be replaced and with what in the entry for Question. Leave other pointers in the Tooltip entry.

- Save the configurations.
xml snippet
<?xml version=”1.0″ encoding=”utf-8″ standalone=”yes”?>
<ProjectWizardConfiguration>
<Placeholder Name=”Team A” RequestReplacement=”True” Question=”What should be the name of your first team?” ToolTip=”Hints“/><ProjectSetting RequestStartDate=”True” />
</ProjectWizardConfiguration>