
Create queries
To create queries, you need query types. In objectiF RPM, you’ll find predefined query types for standard project elements that you can use.
Create simple query
Create simple queries if, for example, you want to display all requirements of a package or the entire project in a flat list.
As mentioned earlier, you need a query type for each query. This determines which properties are available for an element in a query. The tool already includes a number of predefined query types that you can use right away.
You can recognize query types for flat lists by the name …list.
If you have defined your own artifacts, you must first create a query type before you can create a query.
- Open the Explorer using the vertical toolbar.
- From the context menu of a package, select the command Create other → Query.
- First, select a query type by clicking the […] button next to Query type.
Navigate to the package containing the query types. By default, you’ll find them in the Settings → Query Types package.
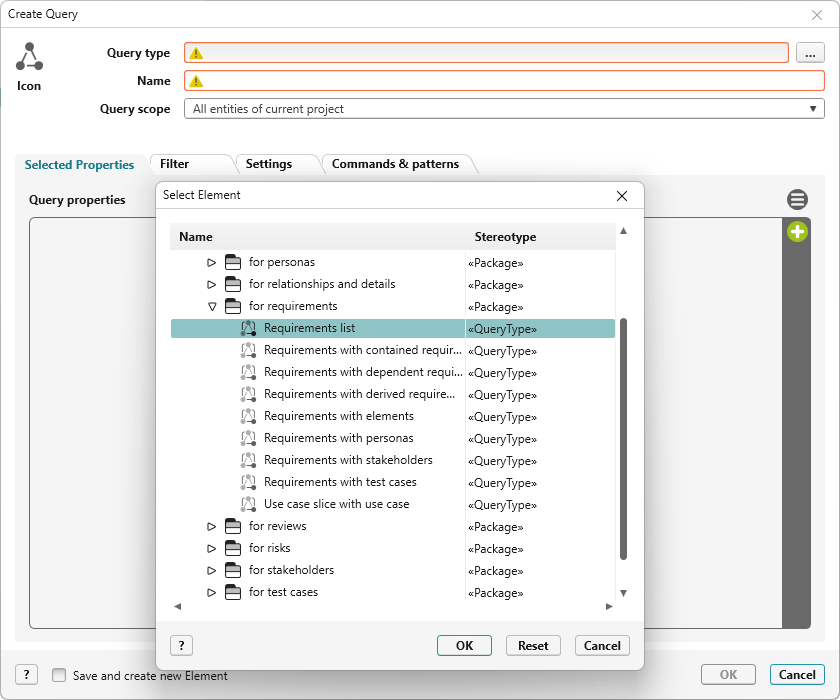
- By default, the name of the selected query type is entered in the Name field. Overwrite the name if you do not want to use the suggested one.
- Under Query scope, specify whether the query should cover the entire project or only a specific package. Use the drop-down menu to do this.
- Under Context elements, specify one or more specific packages from the project from which the elements should be sourced.
- Now switch to the Selected Properties tab and click the plus button. In the dialog that appears, select the properties you want to display in the query.
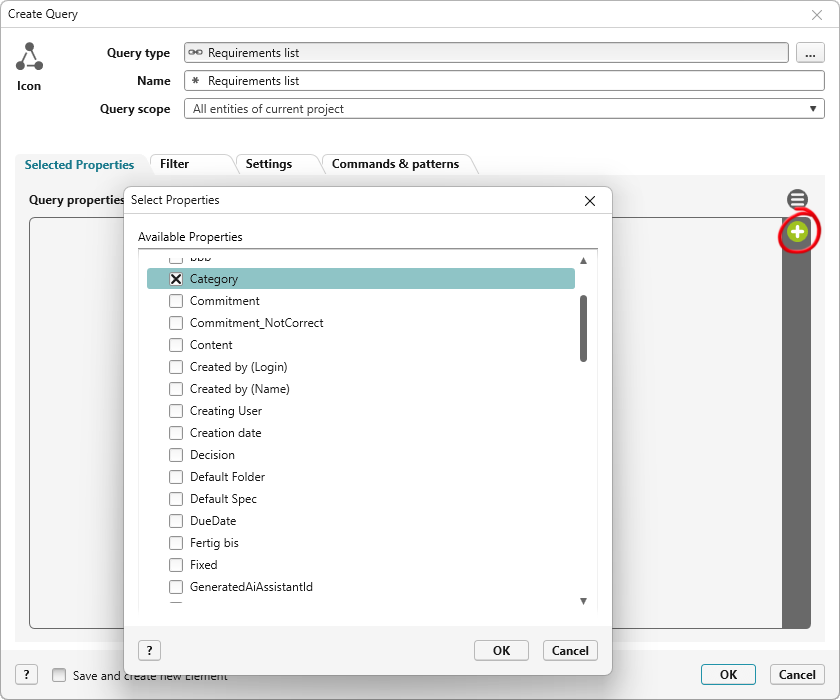
- Save.
Creating Detail Queries
To create a detail query, you need a query type with an integrated query type. This integrated query type is based on the relationship between two element types that are to be displayed in the query. There is always a primary element at the top level that is evaluated first. Below it, the associated elements appear as the detail level.
You can also identify query types for detailed queries by their names. Typical examples include:
- Requirements with stakeholders or
- Documents with reviews.
- Open the Explorer using the vertical toolbar.
- From the context menu of a package, select the command Create other → Query.
- First, select a query type by clicking the […] button next to Query type.
Navigate to the package containing the query types. By default, you’ll find them in the Settings → Query Types package. - By default, the name of the selected query type is entered into the Name field. Overwrite the name if you don’t want to use the suggested one.
- Under Query scope, specify whether the query should cover the entire project or only a specific package. Use the drop-down menu to do this.
- Under Context elements, specify one or more specific packages from the project from which the elements should be sourced.
Now switch to the Selected Properties tab. - Click the plus button to select all desired properties that belong to the element type to be evaluated first.
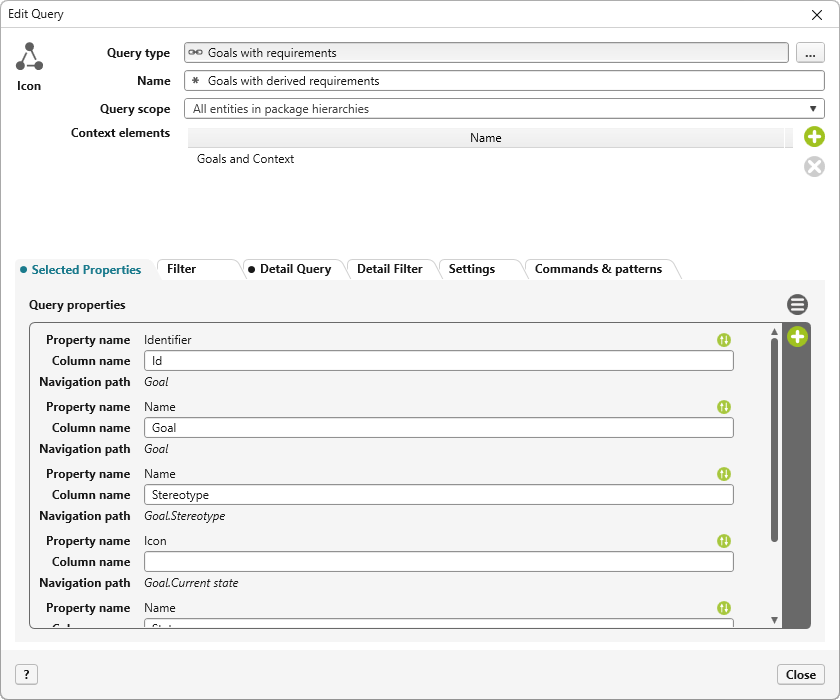
- Next, go to the Detail Query tab of the detailed query.
- Here, select the properties that belong to the second-level element type.
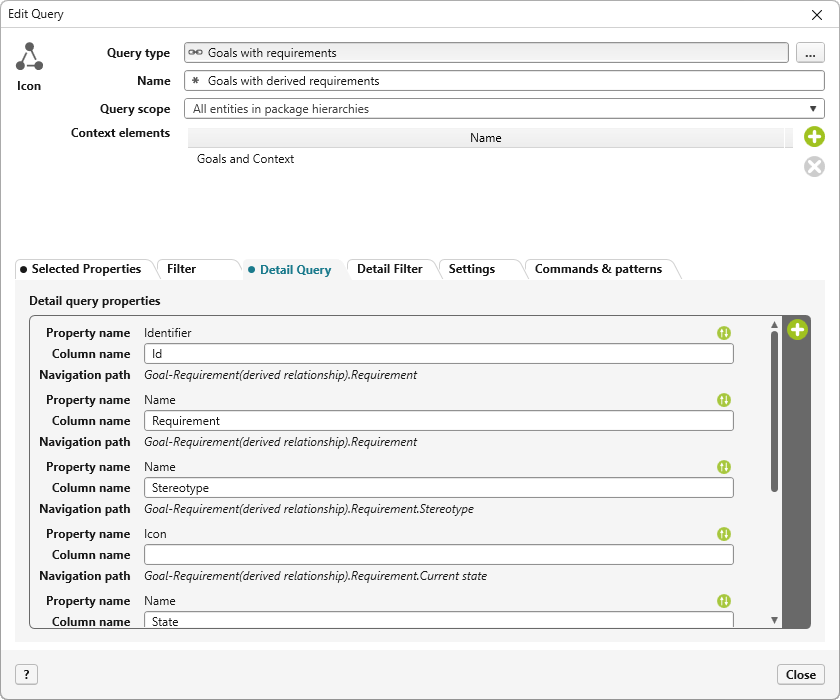
- Save.
Additional Settings
In the Filter, Detail Filter, Settings, and Commands & patterns tabs, you can configure additional settings, all of which are optional.
Filter and Detail Filter
If you want to limit the elements to be analyzed based on specific criteria, you can do so using the filter.
- To do this, go to the Filter or Detail Filter tab and click the plus button.
- Select a filter you want to use and specify the properties using the editable fields (underlined in blue).
Some properties can be selected from a list, while others require you to know the exact value to enter them. Again, the filters set under Filter apply to the first-level element type, and those under Detail Filter apply to the second-level element type.
Changing Column Names
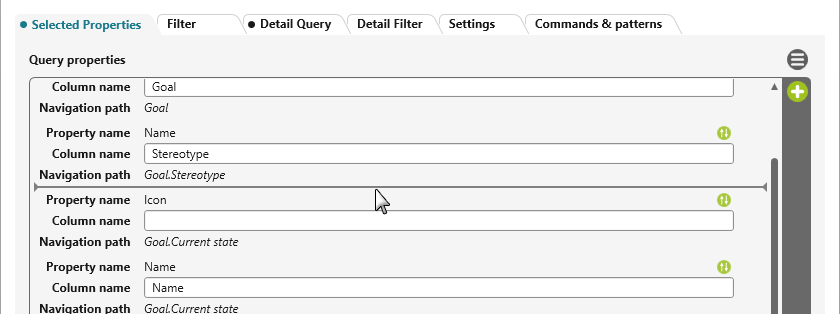
When you select properties for a query, their names are automatically displayed as column headers.
If you want to customize the column header, select the displayed name in the column list and replace it with the text of your choice. The new name will then also be used as the column header in the query.

Move Properties
You can reorder the selected properties. Hold down the mouse button and drag and drop the columns to the desired position.
Creating Cross-Project Queries
To create a cross-project query, first navigate to an organization. There, use the command Create other → Query to create a query,
Under Query scope, select the option All Entities of Projects/Organizations. Under Context elements, you can then specify which projects and/or organizations should be included in the query.
The rest of the configuration is the same as for a normal query.