Working in queries
Queries do not only display certain project contents. You can also use them to work within them. Create new elements using configured commands, edit the displayed elements directly in the query or export the result list to Word or Excel.
Operate in queries
In queries, there are columns, such as name, state, etc., which you can edit directly in the query. The table below shows which columns you can change:
| Name | If you want to change the name, click in the Name box and overwrite it. Alternatively, you can select the line and press F2. |
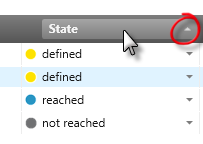
| State | The status is displayed via a dropdown menu. The dropdown menu is indicated by the small arrow behind the state. Click on it and select another state. |
| Rank | The rank is also displayed via a drop-down menu. Click the arrow behind the rank and select a new rank. You will be offered the rank in steps of five via the drop-down menu. Alternatively, you can click in the field and enter a number between 0 and 100. |
| Description | Double-click in the description field and change the text. Click OK to save the changes. You will not be able to format the text or insert images here. |
| Create dependencies | In some queries, such as the requirements list, you can relate items together by simply dragging one requirement to another. It doesn’t matter whether the items are in the query or in a package in the Products window. Whether relationships can be created depends on whether they can also be created in the editing dialog for the respective elements. |
Sorting in queries
In queries, you can sort the contents in the columns by clicking in the column name. A small arrow on the right shows the direction. The columns are sorted alphabetically from A to Z and from Z to A respectively.
Create command for a query
If you want to create further elements of a certain type in a query, you can define a command for them. The command is then offered in the query – top right – as a plus button.
- In the context menu of a query, select Edit.
- Switch to the Commands & Pattern tab.
- Click the plus button behind Configured commands.
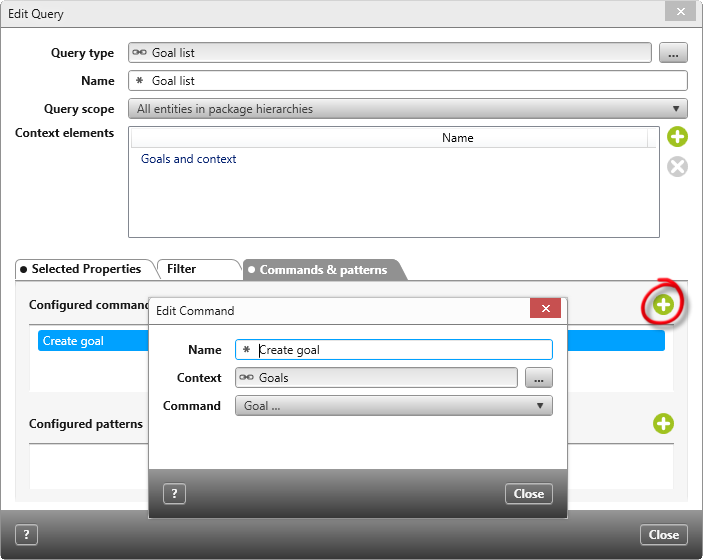
- Enter a name under Name. This name is displayed in the query when you click the plus button.
- Under Context, you specify the package in which the element is to be saved.
- Using the dropdown menu under Command, you select which element type is to be created using the command.
- Click OK. The command is now available in the query.

Export queries
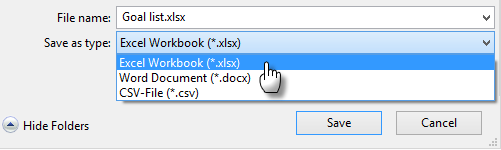
You can export queries to Excel, Word and as a CSV file.
- To export queries, click the Export button in the upper right corner of the query.

- Specify a file name and specify the format.