
The Activity Diagram
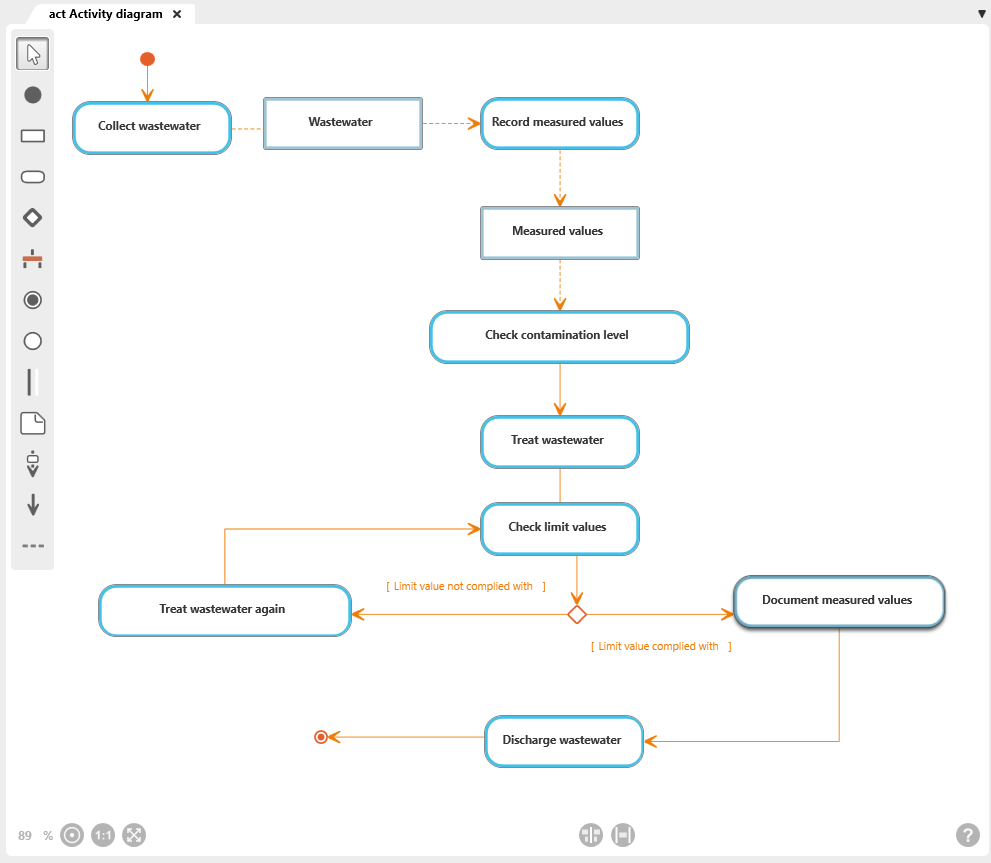
Activity diagrams are used, for example, to describe business processes and use cases and to document the implementation of system processes. Complex workflows can also be clearly represented in activity diagrams. Sequential and concurrent workflows are represented by actions, control flows, and object flows.
The Diagram
Toolbar
A toolbar is available on the left side of the diagram for working in the diagram. This toolbar is used to create elements and relationships and to add existing elements to the diagram. Which elements and relationships can be created with a button is shown in a tooltip when you move the mouse over a button.
Elements that are created in a diagram are created in the package in which the diagram is also located.
Alternatively, elements of the use case diagram can also be added to the diagram via drag & drop from a view or any package.
Permissible Diagram Elements
Not all element types can be used in this diagram type. The permissible diagram elements are determined by the UML modeling standards as well as the underlying modeling rules. Accordingly, the diagram type supports only the element types intended for this purpose.
New elements are always created according to the same principle: Click the button and then click in the diagram. A creation dialog opens, and as soon as the dialog is confirmed, the element is displayed in the diagram.
Actions that are created in the diagram are created as subelements of the model activity.

White arrow
With the selection tool (arrow), you can:
- Move the diagram background: Click the diagram background and drag it to another position while holding down the left mouse button.
- Edit diagram elements and relationships: Right-click a diagram element or relationship to open the context menu.
- Select diagram elements: Hold down the Shift key and use the left mouse button to draw a frame around the

Create Initial Node
The initial node indicates the beginning of the workflow represented in the activity diagram. A diagram must contain at least one initial node.
Procedure for creating: Click the button and then click the diagram background.
Representation: filled orange circle
Supported link: Action, decision node, final node, flow final, fork

Create Object
An object whose data is passed to an action or is created or modified by an action. In addition to instances of classes, variables, constants, or storage of any kind can also be modeled in this way.
Procedure for creating: Click the button and then click the diagram background.
Representation: Object node

Create Action
An action is the smallest executable step in an activity diagram. The sum of all actions describes the behavior of the activity and is triggered by an incoming control or object flow. An action can be invoked multiple times in an activity diagram and can start an action or another activity. If required, individual actions can be further refined in a separate activity diagram.
Procedure for creating: Click the button and then click the diagram background.
Representation: Action node
Supported link: Initial node, final node, action, decision node, fork, object

Create Decision Node
Used to visualize alternative workflows.
Alternative workflows are usually linked to guards (optional).
Procedure for creating: Click the button and then click the diagram background.
Representation: orange diamond
Supported link: Action, initial node, final node, flow final, fork

Create Fork
Used to represent parallel workflows. A control flow can be split into multiple concurrently executed branches (splitting), or multiple parallel branches can be merged back into a common workflow (synchronization). In the fork editing dialog, you can also specify whether the branching is based on And, Or, or Xor guards.
By clicking in the center of the bar, you can switch between horizontal and vertical orientation.
Procedure for creating: Click the button and then click the diagram background.
Representation: horizontal or vertical orange bar
Supported link: Action, fork

Create Final Node
The final node indicates the end of the workflow represented in the activity diagram. A diagram must contain at least one final node. If there are multiple final nodes, each one terminates all actions described in the diagram.
Procedure for creating: Click the button and then click the diagram background.
Representation: orange circle with a filled dot
Supported link: Action, decision node, initial node, flow final, fork

Create Flow Final Node
At this point, an individual control or object flow ends.
Procedure for creating: Click the button and then click the diagram background.
Representation: gray circle
Supported link: Action, decision node, initial node, final node, fork, flow final

Create Object Flow
Connects an action or a control element and thereby describes the transport of data to or from the object node.
Procedure for creating: Click an action and then click an object node. The order of selection depends on whether the object flow is incoming or outgoing.
Representation: orange dashed line with an arrow
Arrow direction: The arrowhead points toward the element clicked last.

Create Control Flow
Connects two actions or an action to a control element and describes the execution sequence of the actions.
Procedure for creating: Click an action and then click the action that is to follow the previously selected action.
Representation: orange line with an arrow
Arrow direction: The arrowhead points toward the element clicked last.

Create Partition
Divides the diagram into areas of responsibility and groups actions.
Partitions can be nested. An action can be assigned to multiple partitions.
Procedure for creating: Define the size of the area by dragging while holding down the mouse button.

Create Note
Used to create a note to provide additional information about the diagram or a diagram element.
Procedure for creating: Click the button and then click the diagram background.
Representation: Note node
Supported link: Possible with all permissible diagram elements

Create Note Relationship
Connects a note to another diagram element.
Procedure for creating: Click the note and then click the element node that is described in more detail by the note.
Representation: gray dashed line