Create new service
You must create a service so that the client can connect to the database. You can create a new database or assign an existing database to the service. If you are working with several databases, you must create and start a separate service for each database.
Note
From the point of view of your database, objectiF RPM Server is a database user. If SQL Server and objectiF RPM Server are on different computers, you must set up a login account for the objectiF RPM Server that is accepted by the SQL Server.
From the point of view of your database, objectiF RPM Server is a database user. If SQL Server and objectiF RPM Server are on different computers, you must set up a login account for the objectiF RPM Server that is accepted by the SQL Server.
Create a new service as follows:
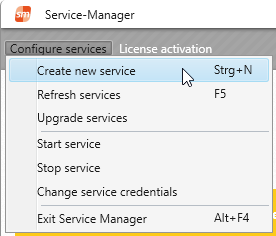
- Configure services/Create new service in the Service Manager using the menu bar.
- in the Service Manager via the shortcut Ctrl + N
- Start the Service Manager via the Windows Start button or from the installation directory. The default path is C:\Programs(x86)\microTOOL\objectiF RPM\Server\x.x.
- After the first start, the application window is empty and informs you that no service is available.
In the menu, choose Configure services/Create new service.
- Under Service name, enter any name for your service. The service name is freely selectable and is appended to the service address.
- In the Endpoint address field, enter the address at which the client is to connect to the service. The name must contain at least the server name on which the objectiF RPM Server is installed, a port, and a description.
So that the service and client can connect, the service contains a standardized web service address. This address consists of a protocol, a port, a base address, and a relative address.
- http://Server name:Port/Basis address/relative address
- http://localhost:7000/microTOOL/oRPM /x.x/AnyName
Note
In order for the clients to be able to connect to the service later, you must make the entered service address available to the members of the team, since the address is required for the login of objectiF RPM.
In order for the clients to be able to connect to the service later, you must make the entered service address available to the members of the team, since the address is required for the login of objectiF RPM.
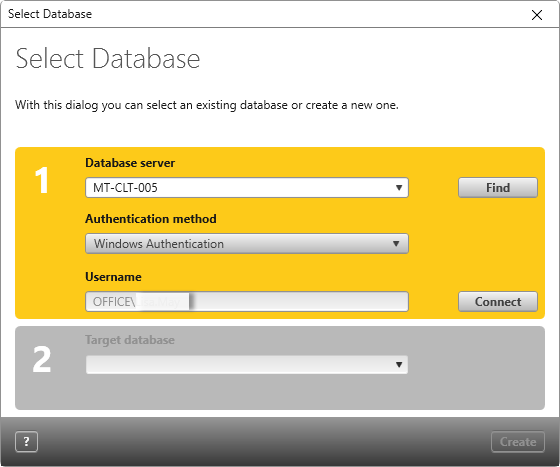
- The […] button next to the Database field opens a dialog in which you can select an existing database or create a new database.
- Under Database server, select your SQL Server. If the server instance is local, the database server is displayed in the drop-down list. Choose Find to select an SQL Server elsewhere in the network.
- Specify the authentication method. The person who created the service must log on to the SQL Server. Make sure that the login to the SQL Server is identical to your authentication method.
The default is Windows Authentification, which does not require any further entries at this point. This is not the Windows logon that you use on your computer running objectiF RPM.
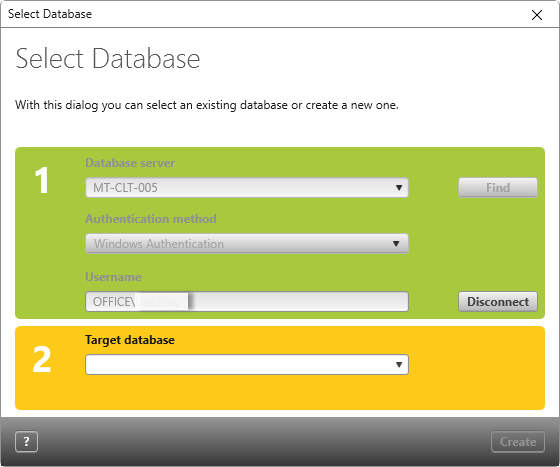
If you select User with Password, the dialog expands. In this case, also enter the user name and password. You logon to the SQL Server. - Click Connect to connect to the database server. As soon as the connection has been established, all databases available on the selected server are offered to you under Target database.
- If you want to create a new database, enter the desired database name and click Create. In the new database, tables are defined and objectiF RPM project templates are inserted into these tables.
Good to know
Creating the database can take up to 10 seconds.
Creating the database can take up to 10 seconds.
As soon as the process is completed, the dialog closes. The database server and database name are transferred to the Service Configuration dialog. The Select Database dialog closes.
- Select the Start service automatically option if the web service is to be started automatically when objectiF RPM Server is started.


