Working in the project plan
Create activity
You can create additional activities directly in the view using an activity’s context menu with Create. You can create the new activity before, after, or as a child activity. The Before the Activity command creates an activity before the selected activity. The Activity command creates the activity as a child activity. The After the Activity command creates an activity under the selected activity.

Include activity references
You can use the context menu of an activity to include activities from other projects in the project plan using the Local Activity Reference or External Activity Reference command. An activity reference is displayed in blue by default and cannot be edited. The project abbreviation of the project from which the activity originates is displayed in brackets behind the name.

Edit activities
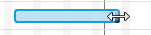
Adjust the duration
- With the mouse: Shorten or lengthen a time bar by moving the mouse to the right edge of the bar and adjusting its length while holding down the mouse button.
- In the properties dialog: Open the properties dialog from the context menu of the activity and enter the desired duration.
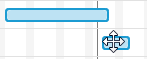
Moving an Activity
- With the mouse: Move the mouse over the appointment bar and drag the bar to the desired appointment while holding down the mouse button.
- In the properties dialog: Open the properties dialog from the context menu of the activity and change the start date or end date.
Enter the processing progress
- With the mouse: Move the mouse to the left edge of a date bar and drag the dark blue progress bar to the desired length.

- In the properties dialog: Open the properties dialog via the context menu of the activity and adjust the entry under Progress (% completed).
Create control flow
- Move the mouse to the end of the appointment bar. The cursor changes to a pencil symbol. Press the left mouse button and drag the mouse to the successor activity.

The control flow is displayed directly in the project plan.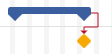
Colorize activities
You can display individual activities in the project plan in color. Select an activity and open the editing dialog. Switch to the Coloring tab and define a new color for the activity and, if necessary, for the child activities.
If you want to assign a new color to the entire diagram, adjust the color for the Activity stereotype. To do this, go to the Settings window and open the Activity stereotype using the Properties context menu command. Switch to the Coloring tab and define a new color.

Label activities
You can display properties of activities such as name, dates, planned effort, etc. as labels in front of, behind, or within an activity. To do this, go to the editing dialog of the view and switch to the Project plan tab. There you can set which property and where it should be displayed in the activity for the individual activity types.
Export project plan
If you click on the Export button in the view, you can save the project plan as a pdf file and then send or print the plan. You can determine in which size (max. A0) the project plan should be saved and which period should be displayed.
Customize display
Click in the gantt chart:
- With the Ctrl key pressed, you can enlarge or reduce the display with the mouse wheel.
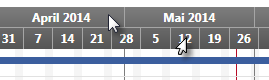
- By double-clicking on a date in the appointment bar, you can change the zoom level: A double-click in the lower section of the bar displays more details – you can change the display from weeks to days or days to hours, for example -, a double-click in the upper section provides a better overview by switching from the weekly view to the monthly view, for example.